Showing Posts From
Beginner
- 26 Mar, 2026
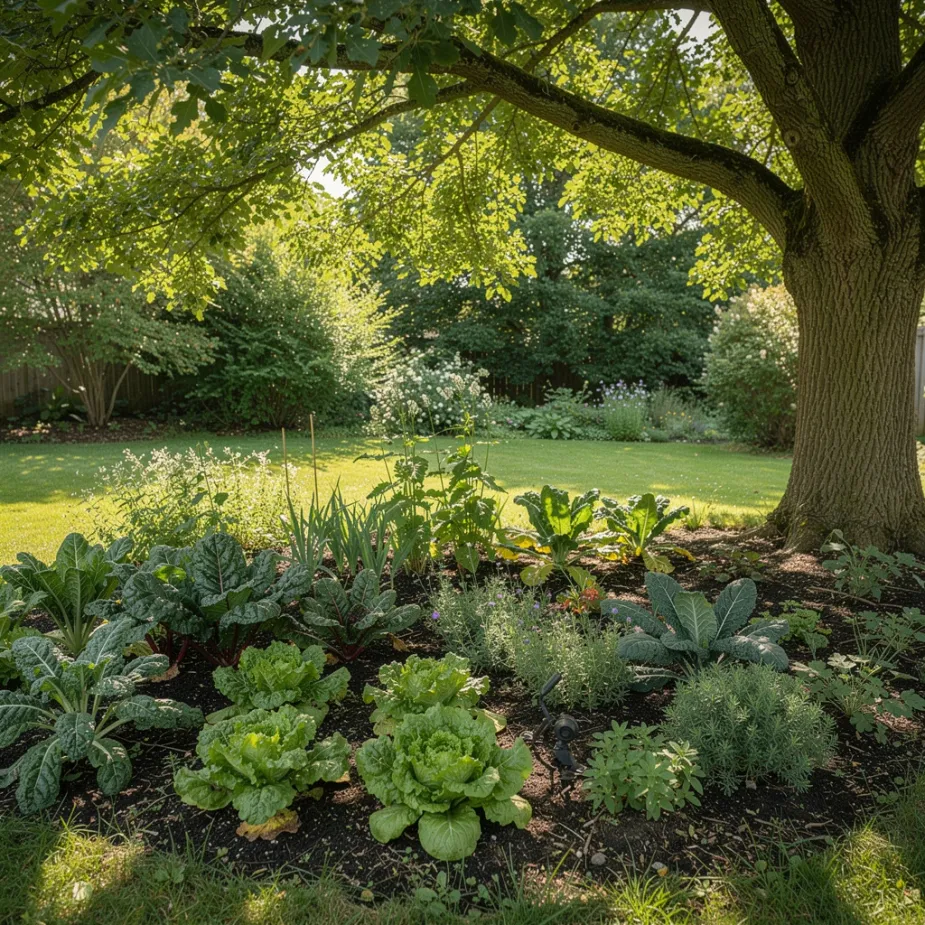
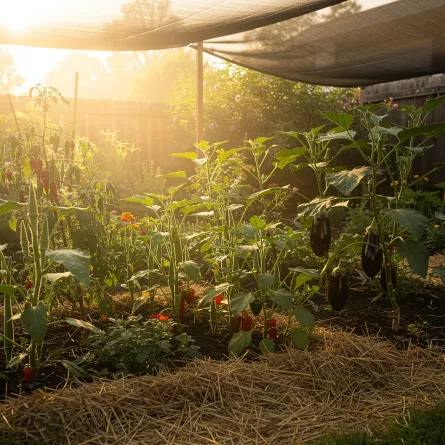
Shade Gardening for Vegetables: What Grows with Less Sun
If your yard gets perfect all-day sun, I am happy for you and just a little jealous. Mine has mature trees, awkward angles, and that one bed that gets beautiful morning light and then basically takes a nap. The good news: you can still grow a lot in partial shade. How Much Sun Counts as Partial Shade For vegetables, partial shade usually means about 3-6 hours of direct sun, plus bright indirect light. In general:6+ hours: many fruiting crops can work 4-6 hours: focus on leafy crops and quick roots Under 4 hours: choose herbs, greens, and manage expectationsBest Vegetables for Shadier Spots Most ReliableLettuce Spinach Arugula Swiss chard Kale Mustard greensAlso Worth TryingBeets (especially for greens and baby roots) Radishes Green onions Peas (especially with cool weather) Some herbs like parsley, cilantro, and mintRoot crops can still work, just usually a bit slower than in full sun. Crops That Need More Sun These generally want stronger light for top yield:Tomatoes Peppers Eggplant Melons Most winter squashIf you grow them in partial shade, lower expectations and choose compact or early-maturing varieties. Layout Tricks That HelpPut tallest crops where they will not shade shorter ones Use reflective light from pale walls or fences when possible Grow sun-lovers in containers so you can move them to brighter spots Keep paths clear so airflow reduces disease risk in cooler shade pocketsFor container strategy, see Container Gardening: Growing Big Harvests in Small Spaces. Watering and Soil in Shade Beds Shade beds often stay moist longer.Check soil before watering, do not water by habit Use compost to improve structure and root health Mulch lightly to keep moisture even without creating soggy conditionsA careful routine from How to Water a Vegetable Garden the Right Way is especially helpful here. A Realistic Harvest Mindset Shade gardens usually produce fewer fruits and more greens. That is not failure. It is just a different style of abundance. Some of my most dependable salad harvests come from my "not ideal" beds. I remember one sticky July evening, knees grumbling as usual, cutting a big bowl of lettuce from a bed that only sees morning sun. I laughed out loud because that bed had proved me wrong again. If your space is shady, start with greens and herbs. Get one reliable win, then expand from there. Related ReadingContainer Gardening: Growing Big Harvests in Small Spaces How to Water a Vegetable Garden the Right Way Root Vegetables for Beginners: Carrots, Beets, Radishes, and Turnips
- 25 Mar, 2026
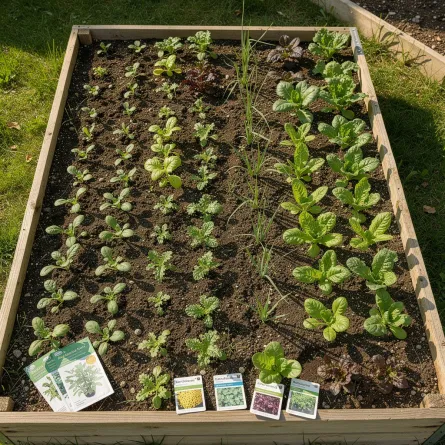
Succession Planting for Continuous Harvests
I used to plant everything in one big enthusiastic weekend and then wonder why I had either too much lettuce or none at all. Succession planting fixed that feast-or-famine cycle in my garden. Think of it as planting in waves instead of one giant push. What Succession Planting Means Succession planting is simply sowing or transplanting crops at intervals so harvests are spread out. Instead of 30 radishes maturing the same week, you plant a short row every 10-14 days and harvest steadily. Why It Helps So MuchMore consistent harvests for the kitchen Less waste from overproduction Better use of garden space all season Easier workload for planting and preservingIf your energy is limited (mine certainly is some weeks), smaller repeat tasks are easier on your body than marathon garden days. Three Easy Succession Methods 1) Same Crop, Staggered Timing Plant the same crop every 1-3 weeks. Great for:Lettuce Radishes Bush beans Cilantro2) Different Crops in the Same Space As one crop finishes, another goes in. Example:Spring spinach Summer bush beans Fall turnips3) Early, Mid, and Late Varieties Plant varieties with different maturity windows at the same time. Example for carrots:Early variety Mid-season variety Storage varietySimple Timing Framework Use days to maturity and your frost dates.Check average first and last frost dates Count backward for fall crops Add a small time buffer in fall when day length shortens Set calendar reminders every 10-14 days for quick re-sowingThis works well alongside Spring Garden Planning: Getting Ready for the Growing Season and Fall Vegetable Gardening: What to Plant and When. Beginner Succession Calendar (Example)Every 10 days: lettuce, arugula, radishes Every 14 days: bush beans (through midsummer) Monthly: carrots and beets in small blocks Late summer: re-sow cool-season greens for fallAdjust to your climate, but the pattern stays the same. Common MistakesPlanting too much in each wave Forgetting to prep replacement seedlings in time Not refreshing soil between crops Ignoring heat stress during summer sowingsA quick compost top-dress between rotations helps beds bounce back. My Practical Rule I keep seed packets in a small basket by the door and sow one short row whenever I water deeply on Sundays. That tiny routine changed my harvests more than any expensive tool ever did. If you are feeling behind, start with one crop to succession-plant this month. One is enough to learn the rhythm. Related ReadingSpring Garden Planning: Getting Ready for the Growing Season Fall Vegetable Gardening: What to Plant and When Root Vegetables for Beginners: Carrots, Beets, Radishes, and Turnips

- 24 Mar, 2026
Common Garden Diseases: Identify, Prevent, and Treat Naturally
Pests get all the attention, but disease is what has broken my heart most often in the garden. One humid week can turn healthy plants into a blotchy mess. The good news is that most disease control is not about expensive sprays. It is about prevention and fast response. Why Disease Shows Up Most garden diseases need three things:A susceptible plant A pathogen (fungus, bacteria, or virus) Favorable conditions (often moisture plus poor airflow)Break one piece of that triangle and you reduce damage. Most Common Home-Garden Diseases Powdery MildewLooks like white powder on leaves Common in squash, cucumbers, zinnias Favored by crowded growth and poor airflowEarly BlightBrown spots with rings, often on lower tomato leaves Spreads upward if unmanaged Often worsens with leaf wetness and soil splashDowny MildewYellow patches on top of leaves, gray fuzz below Moves quickly in humid weather Common in cucurbits and basilDamping Off (Seedlings)Seedlings collapse at soil line Usually from overly wet, poorly ventilated seed-starting conditionsPrevention-First Routine 1) Space Plants for Airflow Crowding is a disease invitation. Give plants enough room for leaves to dry quickly after dew or rain. 2) Water the Soil, Not the Leaves Use drip irrigation, soaker hoses, or careful hand watering low at the base. For a full watering method, see How to Water a Vegetable Garden the Right Way. 3) Mulch to Reduce Soil Splash Mulch lowers the chance of pathogens splashing onto lower leaves during rain.Straw or shredded leaves work well Maintain 2-3 inches around plants4) Remove Infected Leaves Early At first sign, prune affected leaves and discard them in trash, not compost (unless your compost system runs hot enough to kill pathogens). 5) Rotate Crop Families Do not grow tomatoes in the same bed year after year. Rotation reduces disease carryover. 6) Keep Tools Clean Wipe pruners between plants if disease is active. A quick sanitize pass can prevent spread. Natural Treatment Options When prevention is not enough, these can help limit spread:Copper-based organic fungicides (follow label exactly) Potassium bicarbonate products for some fungal issues Biological fungicides (Bacillus-based) as preventative sprays Neem oil for certain fungal pressuresAlways test sprays on a small section first and avoid spraying in hot midday sun. Quick Symptom TableSymptom Likely Disease Type First ActionWhite powder on leaves Powdery mildew Remove worst leaves, improve airflow, apply targeted sprayBrown lower-leaf spotting Early blight Prune lower leaves, mulch, avoid overhead wateringSeedlings suddenly collapse Damping off Improve airflow, reduce moisture, use sterile mixLeaf yellowing with fuzzy underside Downy mildew Remove infected foliage quickly, reduce leaf wetnessWhere Pest and Disease Management Meet Healthy, unstressed plants resist disease better. Build that foundation with compost, mulch, and beneficial insect support. Pair this guide with Natural Pest Control: Protecting Your Garden Without Chemicals and Companion Planting: Friends and Foes in Your Garden. A Realistic Mindset You can do everything right and still lose a crop in a tough season. That is gardening, not failure. What matters is spotting problems earlier each year and tightening your routine. If you want one action to start today, prune lower crowded leaves on tomatoes and add fresh mulch. Small prevention steps pay off quickly. Related ReadingNatural Pest Control: Protecting Your Garden Without Chemicals Companion Planting: Friends and Foes in Your Garden Mulching for Healthier Garden Beds: A Practical Guide
- 22 Mar, 2026
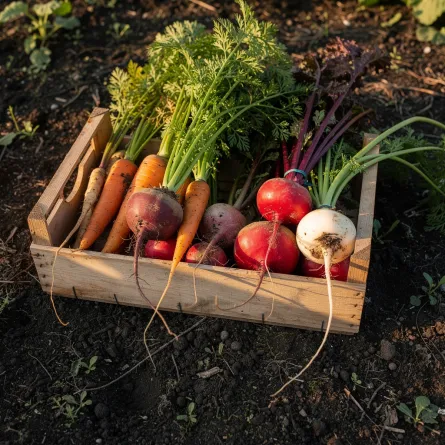
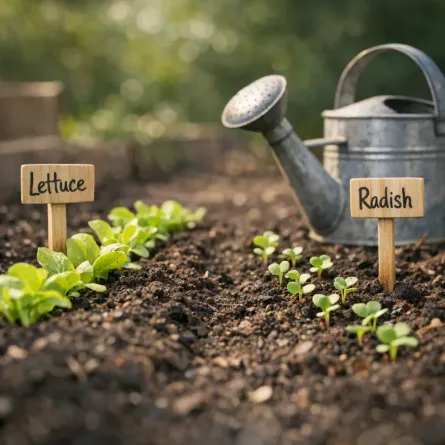
Root Vegetables for Beginners: Carrots, Beets, Radishes, and Turnips
Root crops taught me patience. You do all this work and then wait for weeks with almost nothing to look at above ground. But when you pull that first good carrot, it feels like a tiny miracle. If root vegetables have disappointed you before, you are not alone. Most trouble comes down to timing, soil texture, and thinning. Best Root Crops to Start With If you are new, begin with these four:Radishes: Fast and forgiving Beets: Reliable and dual-purpose (roots plus greens) Turnips: Great in cool weather Carrots: A little fussier, but worth itPlant small batches every 2-3 weeks for a steady harvest. Soil Prep Matters More Than Fertilizer Root crops need loose, stone-free soil so roots can grow straight.Remove rocks and clumps from top 8-10 inches Mix in finished compost, not fresh manure Avoid high-nitrogen fertilizer before sowing Keep soil consistently moist during germinationFresh manure or heavy nitrogen tends to produce lots of leafy tops and misshapen roots. Planting Timing Root vegetables prefer cool weather. SpringSow as soon as soil can be worked and temperatures are mild Keep rows moist until seedlings establishFallStart 8-10 weeks before first expected frost Cool nights improve sweetness in many rootsFor season mapping, pair this with Spring Garden Planning: Getting Ready for the Growing Season and Fall Vegetable Gardening: What to Plant and When. The Most Ignored Step: Thinning I know thinning feels wasteful, but crowded seedlings produce tiny roots.Radishes: 1-2 inches apart Beets: 3-4 inches apart Turnips: 3-4 inches apart Carrots: 2-3 inches apartThin in stages if that feels easier on the heart. Watering for Better Roots Inconsistent moisture causes splitting, toughness, and uneven growth.Aim for steady moisture, not soggy soil Water deeply when top inch dries out Mulch lightly once seedlings are establishedUse How to Water a Vegetable Garden the Right Way if you want a full watering framework. Common Problems and Quick FixesProblem Likely Cause Quick FixForked carrots Compacted or rocky soil Loosen soil deeper and screen out stonesTiny roots Overcrowding Thin earlier and more aggressivelySplit roots Uneven watering Keep moisture consistentBitter flavor Heat stress or over-maturity Harvest younger and mulch betterPoor germination Dry seedbed Keep top layer evenly moist until sproutedHarvest WindowsRadishes: Often ready in 3-5 weeks Baby beets/turnips: About 5-7 weeks Full carrots: Depends on variety, often 10+ weeksDo not wait too long "for bigger roots." Many get woody if left too long in heat. My Root-Crop Habit I keep a little packet box by the back door and direct-sow a short row whenever I have 15 spare minutes. That tiny habit gives me far more roots than one big all-at-once planting. If your garden feels overwhelming, start with one row of radishes this week. Small starts still count. Related ReadingSpring Garden Planning: Getting Ready for the Growing Season Fall Vegetable Gardening: What to Plant and When How to Water a Vegetable Garden the Right Way
- 20 Mar, 2026
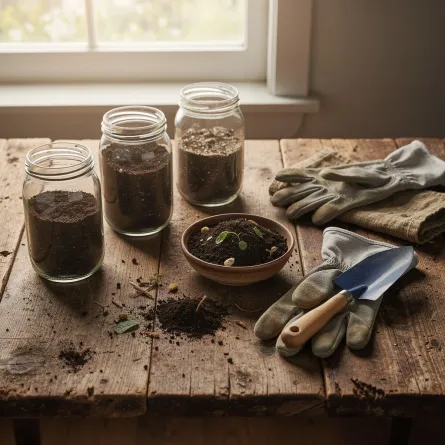
Spring Soil Testing and Amendments: Start Strong Without Guessing
I used to toss random bags of "garden booster" into my beds and hope for magic. Some years I got lucky. Some years I got giant leaves and almost no tomatoes. Soil testing fixed that guessing game. You do not need to become a chemist. You just need a baseline. Why Test Soil in Spring A spring test tells you what your soil actually needs before planting season gets busy.pH affects whether plants can use nutrients Nutrient levels show what is low or excessive Organic matter helps predict water-holding and structureWhen you know those three things, your fertilizer choices become much simpler. How to Take a Good Soil Sample Take your sample before heavy fertilizing.Use a clean trowel and bucket Pull small samples from 6-10 spots in one bed area Sample from root depth (about 6 inches for most vegetable beds) Mix thoroughly and remove stones/roots Let soil air-dry, then submit according to lab directionsTest separate areas separately if they are managed differently (for example, raised beds vs in-ground plots). Understanding the Results (Without Overthinking) pH Most vegetables prefer roughly 6.0-7.0.Low pH (too acidic): often corrected with agricultural lime High pH (too alkaline): usually improved gradually with organic matter and sulfur-based amendments where appropriateNitrogen, Phosphorus, PotassiumLow nitrogen: pale leaves and weak growth Low phosphorus: stunted growth and poor root development Low potassium: weak plants and poor stress toleranceFollow your lab's rates first. Avoid stacking extra products "just in case." Amendments That Actually Help Compost My favorite all-purpose amendment.Improves structure in clay and sandy soils Adds slow-release nutrients Supports soil lifeApply 1-2 inches as a top layer each spring, then lightly work in or leave as top-dressing. For basics, revisit Composting 101: Turn Kitchen Scraps into Garden Gold. Aged Manure Useful when fully composted and applied thoughtfully.Good fertility boost Best added well before planting heavy feedersLeaf Mold Excellent for moisture retention and soil texture.Especially helpful in sandy beds Gentle and low riskMineral Amendments Use only when your test indicates a need.Lime for low pH Gypsum for structure/specific calcium needs Rock phosphate or potash only if deficientEasy Spring Soil Routine Here is the routine I follow now:Test soil in late winter or early spring Add compost to all beds Correct pH only if needed Add targeted nutrients based on results Mulch after planting to protect soil gainsIt sounds like a lot, but once you do it once, it becomes a calm yearly rhythm. One Gentle Reminder Soil improvement is a long game. You are building a living system, not flipping a switch. If this is your first year testing, that is a big win already. If your energy is low, do one bed first and compare results. Seeing healthier growth in that one bed is usually all the motivation you need. Related ReadingComposting 101: Turn Kitchen Scraps into Garden Gold Spring Garden Planning: Getting Ready for the Growing Season Mulching for Healthier Garden Beds: A Practical Guide
- 18 Mar, 2026
Summer Heat Heroes: Vegetables That Thrive in Hot Weather
If your garden turns into a crispy little panic zone in July, you are not doing anything wrong. Some summers feel like standing in front of an open oven. I used to think the whole season was doomed once daytime temps sat above 90F, but a few smart crop choices changed everything. The trick is simple: grow vegetables that like heat and protect the rest with good routines. Heat-Tolerant Crops That Keep Going These are my reliable summer workhorses:Okra: Loves heat and keeps producing when many plants sulk Southern peas (cowpeas/black-eyed peas): Tough, productive, and forgiving Sweet potatoes: Vigorous growth once the soil warms up Malabar spinach: Not true spinach, but wonderful in heat Yardlong beans: Productive climber in hot weather Eggplant: Thrives when nights stay warm Peppers: Better performance with steady moisture and mulchIf you have room, plant at least two of these every year. That way, even in rough weather, you still bring in harvests. Watering in Heat Without Wasting Water Hot-weather watering is about consistency, not panic.Water deeply 2-3 times per week instead of shallow daily sprinkles Water early in the morning so roots are charged before afternoon heat Target soil, not leaves, to reduce disease pressure Check moisture 2 inches down before watering againIf you want a full foundation, pair this with How to Water a Vegetable Garden the Right Way. Mulch Is Not Optional in a Heat Wave Mulch acts like shade for your soil.Add 2-3 inches of straw, shredded leaves, or untreated grass clippings Keep mulch a little away from stems to prevent rot Replenish midsummer as it breaks downGood mulch can lower soil temperature, hold moisture, and reduce plant stress in one shot. I lean on this heavily in July. For a deeper how-to, see Mulching for Healthier Garden Beds: A Practical Guide. Simple Shade Tricks That Work Even heat-loving plants appreciate protection during extreme spells.Use 30% shade cloth over hoops during peak afternoon sun Give newly transplanted seedlings temporary shade for 3-5 days Plant taller crops on the west side to cast light afternoon shadeYou do not need a fancy setup. I have used clipped bedsheets in a pinch and saved young basil that would have fried otherwise. Signs of Heat Stress to Catch Early Watch for these before plants crash:Leaf curl during the hottest part of the day that does not recover by evening Blossom drop on tomatoes and peppers Bitter greens and bolting herbs Dull, gray-green foliage and slowed growthWhen you see this, shift to a recovery routine: deep morning water, fresh mulch, and temporary shade. A Practical Mid-Summer Reset Plan When your beds look tired, do this over one weekend:Remove dead or diseased foliage Top-dress with compost Refresh mulch Reseed quick crops in any open spaces (bush beans, basil, cucumbers) Install shade support before the next heat spikeThis reset pairs well with Late-Summer Garden Reset: What I Do When the Beds Look Tired. My Heat-Season Rule I no longer chase perfection in high summer. I chase resilience. A garden that survives a rough heat stretch and still gives you peppers, beans, and herbs is a successful garden. If your beds are struggling right now, start with one thing: mulch first. Then adjust watering. Those two changes alone can turn the season around. Related ReadingHow to Water a Vegetable Garden the Right Way Mulching for Healthier Garden Beds: A Practical Guide Late-Summer Garden Reset: What I Do When the Beds Look Tired
- 16 Mar, 2026
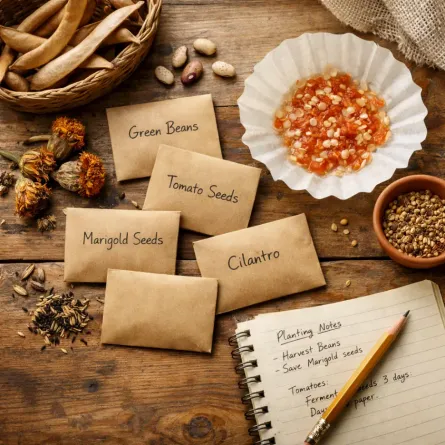
Seed Saving for Beginners: Keep the Best from This Year for Next Year
The first time I saved seeds, I felt a little ridiculous about how proud I was. It was just a labeled envelope of marigold seeds tucked in a kitchen drawer, and I looked at it like treasure. But that tiny envelope grew into one of my favorite garden habits. Seed saving is practical, yes. It can save money, preserve varieties you love, and help plants adapt over time to your garden. But it is also deeply satisfying. You close the loop from seed to plant and back to seed again. If you are new to this, start simple. You do not need to save seeds from everything your first year. Why Save Seeds? A few reasons I keep doing it:Lower costs over time Keeps favorite varieties in rotation Builds resilience with plants adapted to your conditions Feels meaningful to carry the season forwardOne note right away: seed saving is easiest and most reliable with open-pollinated and heirloom varieties. Know What Not to Save (Yet) You can save seeds from hybrid plants, but they often will not grow "true" next season. That means the new plants may be different in size, flavor, productivity, or color. For best beginner success:Choose open-pollinated varieties Label plants at planting time so you remember what they areEasiest Crops to Start With If you are anything like me, quick wins keep the motivation up. Beans and Peas These are wonderfully easy.Leave healthy pods on the plant until they dry fully. Harvest when pods are papery and brittle. Shell and remove damaged seeds. Let seeds air-dry another few days indoors.Store in a cool, dry place. Lettuce Let one or two plants bolt and flower. After flowering, fluffy seed heads form.Collect when heads look dry and feathery Rub gently between fingers to release seed Separate as much chaff as practicalNot glamorous, but very doable. Marigolds and Zinnias Perfect for beginners and very forgiving.Wait until blooms are fully dry on the plant Pull seed heads and break apart over a bowl Remove moisture-prone petals/debris before storageMy first saved marigolds came up like little old friends the next spring. Tomatoes: Slightly More Steps, Still Worth It Tomatoes need fermentation to remove the gel coating around the seed. Simple Tomato Seed ProcessScoop seeds and gel into a jar with a little water. Let sit 2-4 days at room temperature, stirring daily. Once a light mold forms, add water and pour off floating pulp. Rinse good seeds that sink. Spread seeds on a plate or coffee filter to dry completely (about 5-7 days).Label clearly with variety and year. If tomatoes are your main crop, pair this with your existing Growing Tomatoes Guide so you can track which varieties truly earn a repeat spot. Keep Seeds Dry, Dark, and Cool Storage matters as much as collection. My simple setup:Paper envelopes for each variety Envelopes inside a sealed glass jar Jar stored in a cool closet Silica packet or dry rice pouch nearby for humidity controlWhat I write on every envelope:Variety name Crop type Date saved Notes (flavor, vigor, disease issues)That little note line helps so much when planning spring sowing. Common Mistakes (I Have Made Most of These)Storing seeds before fully dry Forgetting labels (you will not "definitely remember") Saving from weak or diseased plants Mixing varieties accidentallyIf a batch fails, do not take it personally. Seed saving is a skill, and each season teaches you something. How Long Seeds Usually Last General home-storage ranges:Beans and peas: 3-5 years Tomatoes: 4-6 years Lettuce: 2-4 years Marigolds/zinnias: 2-5 yearsViability depends on storage conditions. If in doubt, do a quick germination test before planting season. Quick Germination TestPlace 10 seeds on a damp paper towel. Fold and place inside a loosely sealed bag. Keep warm and check after several days. Count how many sprout.If 8 out of 10 sprout, you are around 80% germination. Easy math, very helpful. A Gentle First-Year Seed-Saving Plan If you want a calm start, try this:Save one flower (marigold or zinnia) Save one easy vegetable (bean or pea) Save one "stretch" crop (tomato)That is enough to build confidence and keep it enjoyable. Last fall, I sat at my kitchen table with a cup of tea and a stack of little seed envelopes, labeling them while rain tapped at the windows. It felt old-fashioned in the best way, like I was writing a note to next spring. Start with one packet this year. One is plenty. By next season, when those saved seeds wake up in your soil, you will understand exactly why gardeners get attached to this process. Related ReadingSpring Garden Planning: Getting Ready for the Growing Season Succession Planting for Continuous Harvests Creating a Pollinator Paradise: Attracting Bees and Butterflies to Your Garden
- 14 Mar, 2026
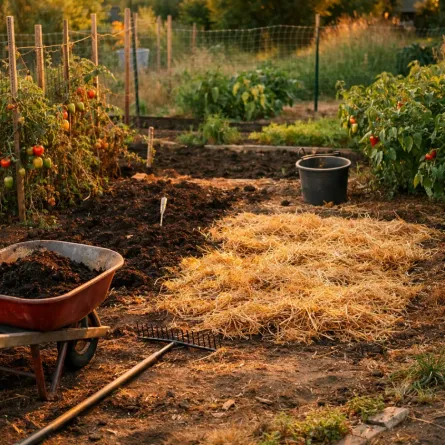
Late-Summer Garden Reset: What I Do When the Beds Look Tired
By late summer, my garden always looks a little... honest. Tomatoes are sprawling, cucumbers are dramatic, some beds are glorious, and some look like they gave up two weeks ago. For years, I used to feel behind at this point in the season. Now I treat late summer as a reset window, not a failure report card. A good reset helps the garden finish strong and makes fall planting much easier. Step 1: Do a Gentle Garden Walk-Through Before pulling anything, I walk the whole garden with a notebook. I check three things in each bed:What is still producing well? What is declining or disease-prone? What space can be reopened for fall crops?This takes 15 minutes and saves me hours of random, unfocused effort. Step 2: Remove What Is Truly Done I used to leave tired plants too long out of guilt. Now I am more practical. Pull or cut back:Spent annuals that are no longer blooming Vegetable plants with clear disease decline Crops that bolted and turned bitter Broken supports and tangled twineHealthy, non-diseased material can go to compost. If disease is present, remove from the garden and discard according to local guidance. If compost is part of your rhythm, this Composting 101 post is handy for deciding what can safely go in. Step 3: Tidy and Re-Support the Keepers Some plants still have plenty left to give in late summer. I usually keep and tidy:Productive tomatoes and peppers Ongoing herbs (basil, parsley, oregano) Flowering pollinator plants still feeding beesQuick actions that make a big difference:Re-tie tomatoes to stakes or strings Remove yellowing lower leaves for better airflow Harvest regularly to encourage continued production Thin crowded growth where humidity is trapping moistureStep 4: Refresh Soil in Open Spaces When a bed section clears, I top it up right away. My basic reset mix:1-2 inches compost Light rake-in at the surface Water deeply to settleIf a bed has had heavy feeders all season (like tomatoes), I may add a balanced organic fertilizer before fall planting. Step 5: Re-Mulch Like You Mean It By now, mulch has usually thinned out or broken down. A fresh layer helps with:Moisture retention during hot spells Fewer weeds in transition weeks More even soil temperaturesI aim for about 2 inches around established plants, keeping mulch a bit back from stems. If mulching has felt confusing, this Mulching Guide explains what to use and where. Step 6: Reset Watering for Reality Late summer watering needs shift quickly as nights cool and days shorten. I adjust by:Checking soil moisture before watering Watering deeply but less often where possible Prioritizing new transplants and containersAnd I remind myself: wilting at noon does not always mean drought. Check soil first before adding more water. Step 7: Plant the Next Wave This is where the reset pays off. Cleared pockets become prime spots for cool-season crops. Depending on your climate, consider:Lettuce, arugula, spinach Radishes and turnips Kale and chard Cilantro, dill, parsleyFor full timing, your Fall Vegetable Gardening Guide has the step-by-step planning approach. Step 8: Take Notes for Next Year I keep this very simple. At the end of a reset day, I write:one thing that worked one thing that struggled one change to make next seasonThat tiny habit has improved my garden more than any fancy tool. My Two-Hour Late-Summer Reset Plan When I am short on energy, this is my realistic version:20 minutes: walk-through and notes 35 minutes: remove spent plants from one or two beds 25 minutes: compost + rake + water in open spaces 20 minutes: re-tie and tidy productive plants 20 minutes: sow quick fall crops or transplant startsThen I stop. Even if more could be done. A couple summers ago I sat on the back step after one of these reset sessions, sweaty and dusty and not exactly glamorous, and realized the garden looked calm again. Not perfect. Just cared for. If your beds look tired right now, you have not missed your chance. Start with one bed this week, reset it gently, and let that small momentum carry you into fall. Related ReadingSummer Heat Heroes: Vegetables That Thrive in Hot Weather Common Garden Diseases: Identify, Prevent, and Treat Naturally Fall Vegetable Gardening: What to Plant and When
- 10 Mar, 2026
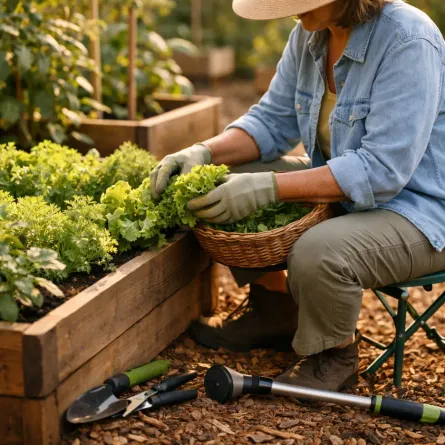
Gentle Gardening: How I Keep Growing with Achy Knees and a Complaining Back
I used to think "real" gardening meant kneeling for hours, hauling heavy bags, and powering through no matter how stiff I felt. These days, my knees have opinions and my lower back has a full-time complaint department. And honestly? I still garden just as much. I just garden smarter. If your body is changing, if your energy dips by mid-afternoon, if you love your garden but dread how you will feel afterward, you are not doing anything wrong. You just need a different rhythm. Let Go of the All-or-Nothing Mindset The biggest shift for me was this: a 20-minute garden session counts. Not every day needs to be a "big garden day." In fact, I now plan for short sessions on purpose.15-20 minutes: weeding one bed 20 minutes: deadheading and quick watering check 30 minutes: harvesting and tidying pathsThree short sessions in a week often do more than one exhausting marathon that leaves you sore for two days. Build Comfort into the Garden Itself Raised Beds Save More Than Time If your back complains when you bend, raised beds are worth every bit of effort and cost. What has helped me most:Beds 12-18 inches high for easier reaching Paths wide enough for a stool or garden cart Keeping bed width to about 3-4 feet so I can reach the center without stretchingIf you are thinking about setup, this guide on Raised Bed Gardening is a great companion. Add Places to Sit I have a small folding stool that follows me around like a loyal dog. Best purchase I made in years.Use a garden kneeler/bench combo Keep one stool in each main garden zone Sit for sowing, thinning, and harvesting low cropsSit-down gardening is still gardening. Period. Soften the Ground You Walk On Hard, uneven paths make fatigue worse. I noticed this right away.Add wood chips or fine gravel on paths Remove tripping hazards and edging that catches your foot Use stepping stones in muddy spotsSmall path upgrades can make long-term gardening feel safer and less tiring. Use Tools That Work with You For years I used whatever cheap tools were around. My hands and shoulders paid for it. Now I choose tools with comfort first:Long-handled weeders to reduce bending Ergonomic grips for less wrist strain Lightweight hoses or watering wands A wheeled cart instead of carrying loadsIf a tool makes you wince, replace it when you can. You are not being fussy. You are protecting your body so you can keep gardening for years. Pace Your Work Like You Mean It I break tasks into categories: bend-heavy, lift-heavy, and easy-standing jobs. Then I alternate. Example of a kinder flow:10 minutes of weeding (bend-heavy) 10 minutes of pruning or tying plants (standing) 10 minutes of harvesting (mixed) Quick clean-up and doneI also use what I call the "tea timer rule": when the timer goes off, I stand up, stretch, and check in with my back before deciding to continue. Choose High-Reward, Low-Strain Crops Some crops are generous without demanding acrobatics. My personal favorites:Bush beans: productive and easy to pick Lettuce mixes: quick harvests, little fuss Herbs near the door: easy snip-and-go Zinnias: cheerful, resilient, and excellent for cuttingI still grow a few ambitious things, but I balance them with plants that make me feel successful. Watering Without Wearing Yourself Out Dragging a heavy hose across the yard used to finish me off. Now I rely on systems and routines:Soaker hoses or drip lines in main beds Watering wand with shutoff valve for containers Morning checks to avoid emergency evening wateringIf watering feels like a daily battle, this post on How to Water a Vegetable Garden the Right Way is very useful, and the same principles apply beautifully to beds and pots. Recovery Is Part of Gardening I did not use to count recovery as garden work. I do now. After every session:2-3 minutes gentle stretching Water for me, not just the plants A quick note in my journal about what to do nextThat last one helps me start easier tomorrow. No spinning wheels, no standing there wondering where to begin. A Gentle Weekly Plan That Actually Works Here is the rhythm I use in spring and summer:Monday: 20 minutes weeding one bed Wednesday: 20-30 minutes planting or pruning Friday: harvest + deadheading + path tidy Weekend (optional): one bigger project only if my body feels up for itNotice there is built-in grace. Missing one day does not ruin the week. My Quiet Rule for Hard Days Some mornings my back is loud before I even make coffee. On those days, I pick one tiny task:pinch basil tips pull five weeds refill the birdbathThat is enough. Truly. A few summers ago, I sat on my little bench after ten slow minutes of deadheading and watched bees move through the salvia. I had done almost nothing by old standards, but I felt calm and proud and very much alive. That is the kind of gardening I want now. Start where your body is today, not where it was twenty years ago. One raised bed, one stool, one short session at a time is still a beautiful garden life.
- 09 Mar, 2026
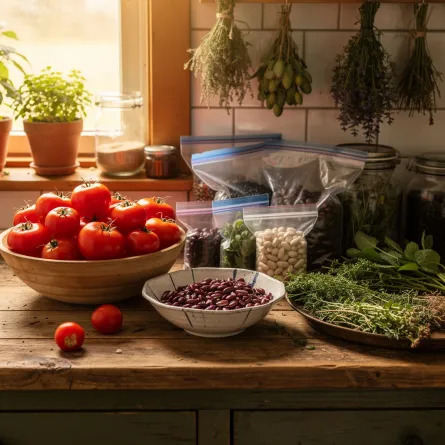
From Garden to Pantry: Easy Preserving for Beginners
There is a very specific kind of summer panic when zucchini, beans, and tomatoes all come in at once. I have stood in my kitchen looking at bowls of produce like, "Well, this escalated quickly." Preserving is how I keep that abundance from turning into guilt. Start with the Easiest Method First You do not need to do everything in year one. Pick one method and get comfortable.Freezing: easiest entry point Drying: great for herbs, some fruits, and peppers Canning: useful and satisfying, but follow safe tested methods closelyFreezing Basics Freezing is my weeknight lifesaver. Best forGreen beans (blanched) Peas (blanched) Corn kernels (blanched) Chopped peppers (raw) Tomato sauce (cooked) Herbs in oil or water cubesBasic ProcessWash and prep produce Blanch vegetables when needed Cool quickly in ice water Drain thoroughly Pack in freezer-safe bags or containers Label with date and contentsI write dates in big marker because future me does not enjoy guessing games. Drying Basics Drying is wonderful when freezer space is tight. Best forHerbs (basil, oregano, thyme, mint) Hot peppers Apple slices Cherry tomatoes (with proper dehydrator settings)TipsKeep pieces uniform for even drying Use low heat and good airflow Store fully dried foods in airtight jars away from lightIf moisture remains, food can mold. When in doubt, dry a little longer. Canning: Keep It Safe and Simple Canning is deeply rewarding, but safety matters.Use tested recipes from trusted sources Water-bath can high-acid foods (like many jams, pickles, some tomato recipes) Pressure can low-acid foods (most vegetables, meats, broths) Never wing acidity levelsIf you are brand new, begin with a simple jam or pickle recipe from a tested source and learn the workflow. What to Preserve First (Beginner Priority List) When harvest is heavy and energy is low, this is my order:Freeze what spoils fastest Dry herbs before they flower or yellow Turn soft tomatoes into quick sauce for freezing Save canning projects for a calmer dayThis keeps food from being lost while still protecting your back and your sanity. Pair Preserving with Garden Planning If you plan to preserve, plant for it on purpose.Grow paste tomatoes for sauce Plant extra basil for drying/pesto cubes Choose bean varieties that freeze well Stagger plantings to avoid one giant harvest spikeThat rhythm works beautifully with Succession Planting for Continuous Harvests. My Quiet Favorite Winter Moment On a gray January day, opening a jar or freezer container from your own garden feels like a small love note from summer. It really does. If you feel overwhelmed by preserving, pick one tray of produce this week and freeze it. Small batches count. Related ReadingLate-Summer Garden Reset: What I Do When the Beds Look Tired Growing Tomatoes: From Seed to Sauce Succession Planting for Continuous Harvests
- 07 Mar, 2026
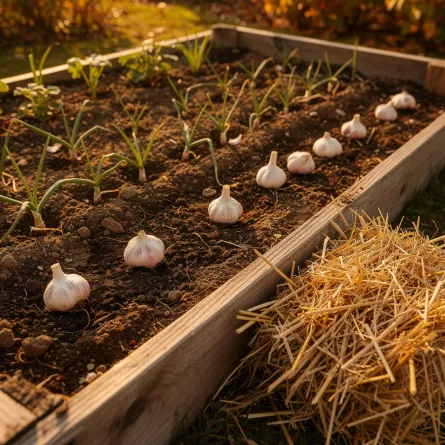
Garlic for Beginners: Plant in Fall, Harvest with a Smile
Garlic is one of those crops that makes me feel smarter than I am. You tuck cloves in the ground in fall, mostly forget about them through winter, and then pull up beautiful bulbs in summer like some kind of garden magician. If you are new to garlic, start simple. It is one of the most forgiving crops I grow. Why Garlic Is Worth GrowingUses very little space Needs less day-to-day fuss than many vegetables Stores well for months when cured properly Gives you both bulbs and optional garlic scapes (if you grow hardneck types)I started with one short row years ago because my knees were acting up and I needed a low-maintenance win. It became a yearly habit. Hardneck vs Softneck HardneckBetter flavor complexity for many cooks Produces edible scapes Often does best in colder climates Usually fewer, larger clovesSoftneckLonger storage life in many conditions No scapes Often more cloves per bulb Common in warmer regions and grocery storesIf you are unsure, ask a local grower or extension office what performs best in your area. When to Plant Garlic Garlic is usually planted in fall, about 4-6 weeks before the ground freezes hard. That timing lets roots establish before deep winter, then growth takes off in spring. For planning windows, pair this with Fall Vegetable Gardening: What to Plant and When. How to Plant Garlic (The Easy Version)Choose healthy seed garlic, not supermarket garlic Separate bulbs into cloves right before planting Plant cloves pointed end up, 2 inches deep Space 4-6 inches apart in rows about 8-12 inches apart Water in well Mulch with 3-4 inches of straw or shredded leavesDo not peel the cloves. Keep the papery wrapper on. Spring Care Once growth begins in spring:Pull weeds early so garlic is not competing Keep moisture steady, especially during bulbing Side-dress lightly with compost in early spring Remove hardneck scapes when they curl (great for pesto)If watering routines are a struggle, this guide helps: How to Water a Vegetable Garden the Right Way. When to Harvest Garlic is usually ready when lower leaves brown but upper leaves are still partly green. A common rule:Harvest when about one-third to one-half of leaves have dried downIf you wait too long, wrappers split and storage quality drops. Curing and Storage After harvest:Brush off loose soil (do not wash bulbs) Cure in a dry, airy, shaded place for 2-3 weeks Trim roots and tops after curing Store in a cool, dry spot with airflowAvoid sealed containers. Garlic likes to breathe. Common Beginner MistakesPlanting grocery garlic that may be treated or poorly adapted Planting too late in fall Overwatering in heavy soils Skipping mulch before winter Waiting too long to harvestMy Gentle Nudge If you only try one new crop this year, make it garlic. Truly. Plant one small bed this fall and let future-you enjoy that first homegrown bulb in summer. That little success feels wonderful. Related ReadingFall Vegetable Gardening: What to Plant and When Mulching for Healthier Garden Beds: A Practical Guide How to Water a Vegetable Garden the Right Way
- 15 Feb, 2026
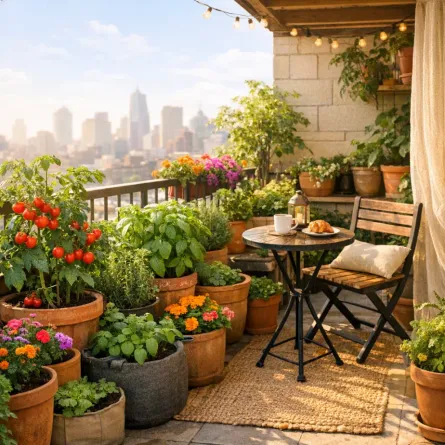
Container Gardening: Growing Big Harvests in Small Spaces
When I lived in my first apartment, I was sure my gardening dreams would have to wait until I had a "real" yard. I was so wrong. That tiny balcony became one of my most productive growing spaces, and it taught me that small spaces can still feed your spirit and your kitchen. Whether you have a balcony, patio, rooftop, or just a sunny stoop, container gardening can do a lot more than people think. Why Container Gardening Works Container gardening isn't a compromise. It's a legitimate and often superior way to grow food.Total portability: Chase the sun, dodge the frost, rearrange at will Perfect soil control: No dealing with rocky or clay-heavy ground Fewer weeds: Seriously, almost none Less pest pressure: Elevated containers dodge many soil-borne problems Accessibility: Garden at any height that's comfortable for you Looks gorgeous: Well-chosen pots add style to any spaceChoosing the Right Containers Size Matters This is the single most important decision in container gardening. Too small and your plants will struggle with heat, drought, and cramped roots.Container Size What to Grow1-2 gallons (small) Herbs, lettuce, radishes, strawberries3-5 gallons (medium) Peppers, bush beans, compact tomatoes, chard7-10 gallons (large) Full-size tomatoes, eggplant, zucchini, cucumbers15-20 gallons (XL) Potatoes, small fruit trees, multiple plantsMy rule of thumb: When in doubt, go one size bigger. Your plants will reward you. Material Options Fabric grow bags: My current favorite! They air-prune roots (preventing circling), drain beautifully, fold flat for storage, and are surprisingly affordable. The only downside: they dry out faster. Terracotta: Classic look, breathable, keeps roots cool. Heavy and breakable, but perfect for Mediterranean herbs. Plastic: Lightweight, affordable, retains moisture well. Choose dark colors with caution as they absorb heat. Glazed ceramic: Beautiful and moisture-retentive. Can be heavy and expensive. Self-watering containers: Fantastic for busy gardeners or hot climates. A built-in reservoir keeps plants consistently hydrated. The Non-Negotiable Rule Every container needs drainage holes. No exceptions. If you find a beautiful pot without holes, drill some. Sitting in waterlogged soil is the fastest way to kill a container plant. The Best Potting Mix Never use garden soil or topsoil in containers. It compacts, drains poorly, and may bring in pests and disease. My Container Mix Recipe60% quality potting mix: Look for one with peat or coco coir 20% compost: For nutrients and beneficial microbes 20% perlite: For drainage and aerationBoosting Your MixAdd slow-release organic fertilizer at planting time Mix in a handful of worm castings for a nutrient boost For moisture-loving plants, add a bit of extra coco coirHow Much Soil Do You Need? A rough guide:5-gallon pot ≈ 0.7 cubic feet of mix 10-gallon pot ≈ 1.3 cubic feet of mix A standard bag of potting mix (2 cubic feet) fills about three 5-gallon potsBest Vegetables for Containers Tomatoes The king of container gardening! Choose compact varieties bred for pots. Best varieties: Patio Princess, Tumbling Tom, Bush Early Girl, Tiny TimMinimum pot: 5 gallons (10 gallons for full-size varieties) Needs a cage or stake even in containers Full sun, consistent wateringPeppers Both sweet and hot peppers thrive in containers. Best varieties: Lunchbox, Shishito, Jalapeño, Mini BellMinimum pot: 3-5 gallons Love heat, so dark containers in full sun work well Feed regularly once fruiting startsLettuce and Salad Greens Perfect for shallow containers and window boxes. Best varieties: Buttercrunch, Red Sails, Mesclun mixes, ArugulaMinimum container: 6 inches deep Can handle partial shade (great for north-facing balconies!) Succession sow every 2-3 weeks for continuous harvestsBush Beans Productive and easy, no trellis needed. Best varieties: Provider, Contender, Mascotte (bred for containers!)Minimum pot: 3 gallons for 3-4 plants Direct sow into containers Full sun, moderate waterCucumbers Choose bush or compact varieties for pots. Best varieties: Spacemaster, Bush Pickle, Patio SnackerMinimum pot: 5 gallons Provide a small trellis or let them trail over the edge Heavy feeders and drinkersStrawberries A container gardener's dream fruit. Best varieties: Albion, Seascape, Mignonette (alpine)Hanging baskets, window boxes, and strawberry planters all work beautifully Everbearing types give fruit from spring through fall Mulch the surface to keep berries cleanWatering: The Critical Skill Watering is where container gardening demands the most attention. Pots dry out much faster than ground soil, especially in summer. The BasicsCheck daily: Stick your finger an inch into the soil. Dry? Water thoroughly. Water deeply: Until water flows from the drainage holes. This ensures the entire root zone gets moisture. Morning is best: Plants have all day to use the water, and foliage dries before evening Never let pots sit in saucers of water: Empty them after rain or wateringHot Weather Survival In peak summer, containers may need watering twice a day. Strategies to cope:Group pots together: They create a humid microclimate Use mulch: Even in containers, a layer of straw or wood chips helps Move to afternoon shade: If plants are wilting despite morning watering Self-watering inserts: Reservoir systems are a lifesaverIf watering is where your containers struggle, read How to Water a Vegetable Garden the Right Way and adapt the same deep-watering principles to pots. Vacation Planning Going away? Options include:Self-watering pots or inserts Drip irrigation on a timer (my favorite solution) Wicking systems with a bucket of water A kind neighbor or friendFeeding Your Container Garden Container plants are entirely dependent on you for food. Nutrients wash out with each watering. Feeding ScheduleAt planting: Mix slow-release organic fertilizer into the soil Every 2 weeks: Liquid fertilizer (fish emulsion, seaweed extract, or compost tea) When fruiting: Switch to a higher-potassium feed for tomatoes and peppersSigns of Nutrient DeficiencyYellow lower leaves: Often nitrogen deficiency Purple-tinged leaves: Could be phosphorus Poor fruit set: May need more potassium Slow growth overall: Time for a balanced feedContainer Garden Design Ideas The Salad Bowl Balcony Dedicate your space to a continuous salad bar:Large pot: Cherry tomato with basil Medium pots: Peppers, cucumbers Window box: Lettuce mix, arugula, radishes Hanging basket: Strawberries Small pots: Herbs (parsley, chives, cilantro)The Vertical Container Garden Go up instead of out:Stack containers on shelving or a plant stand Use hanging baskets at different heights Mount window boxes on railings Train vining plants up trellises attached to the wallThe Front Porch Kitchen Garden Mix edibles with ornamentals for a welcoming display:Large glazed pot: Dwarf tomato or pepper as the centerpiece Surrounding pots: Herbs, nasturtiums, marigolds, and trailing sweet potato vine Window boxes: Lettuces and pansiesOverwintering and Off-Season Container gardens don't have to end when summer does! Cool-Season Crops Many vegetables prefer cooler weather and thrive in fall and spring containers:Kale, spinach, and Swiss chard Peas (with a small trellis) Radishes and turnips Cilantro and parsleyProtecting from FrostMove pots against the house wall (radiant heat) Cover with frost cloth on cold nights Bring small pots indoors temporarilyMy Container Garden Story That first apartment balcony taught me that limitations can spark creativity. With just eight pots on a south-facing rail, I grew enough cherry tomatoes to share with neighbors, more basil than I could possibly eat, and lettuce so crisp I still remember the bite. Even now, with a full garden, I keep containers by the kitchen door because nothing beats stepping out with scissors and snipping herbs for dinner. Start with one pot and one plant. On days when energy is low, that small start is still more than enough. Related ReadingGrowing Herbs on Your Windowsill: Fresh Flavors Year-Round Raised Bed Gardening: Build, Fill, and Grow Your Best Garden Yet
- 12 Feb, 2026
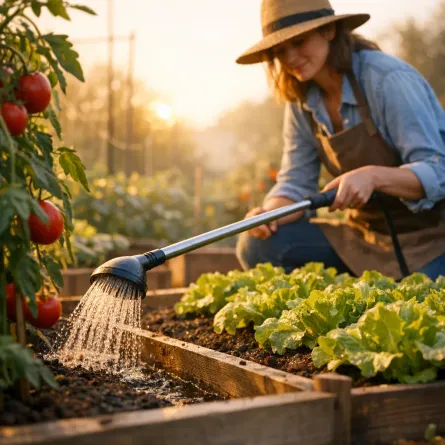
How to Water a Vegetable Garden the Right Way
Watering sounds simple until tomatoes split, lettuce bolts, or seedlings flop over in afternoon heat. I have done all three. Healthy gardens are built on steady watering habits, not panicked rescue watering. This guide will help you water with confidence so plants grow deeper roots, produce better harvests, and stay resilient through hot spells. The Core Rule: Water Deeply, Less Often Most vegetables do best with about 1 to 1.5 inches of water per week, including rainfall. Instead of light daily sprinkles, aim for deep soakings that wet the soil 6-8 inches down. Deep watering encourages roots to grow downward where the soil stays cooler and moister. Shallow watering keeps roots near the surface, where they dry out quickly. Best Time of Day to Water Morning is the best time to water your garden.Cooler temperatures mean less evaporation Leaves dry quickly after sunrise, which lowers disease risk Plants have moisture available before midday heatIf morning is not possible, water in late afternoon. Avoid watering late in the evening, especially in humid climates, because wet foliage overnight can invite fungal disease. How to Check if You Actually Need to Water Do not water by habit alone. Check the soil first:Push your finger 2-3 inches into the soil If it feels dry at that depth, water If it still feels cool and moist, wait another dayFor larger beds, use a trowel to check deeper layers. Soil can look dry on top while still holding enough moisture below. Watering Methods Ranked 1) Drip Irrigation or Soaker Hoses (Best) These methods apply water slowly at soil level, right where roots need it.Very efficient use of water Keeps foliage dry Reduces weeds between rows Easy to automate with a timer2) Hand Watering at Soil Level A watering wand or gentle nozzle works well for small gardens.Good control around young plants Useful for containers and newly transplanted seedlingsTry to avoid splashing leaves and focus on the base of each plant. 3) Overhead Sprinklers (Use Carefully) Sprinklers are convenient but can waste water and increase disease pressure.More evaporation loss Wet leaves can promote mildew and blight Encourages weeds in pathwaysIf sprinklers are your only option, run them early in the morning. Different Crops, Different Needs Not all vegetables use water the same way.Leafy greens: prefer consistently moist soil Tomatoes and peppers: like deep, steady watering, but not soggy roots Root crops: need even moisture to prevent splitting and bitterness Cucumbers and squash: heavy drinkers during fruitingPay extra attention when crops are flowering and fruiting. Water stress at this stage can reduce both quality and yield. Container Gardens Need a Different Plan Containers dry out much faster than in-ground beds, especially in summer. If you grow mainly in pots, use this container gardening guide as your companion plan.Check containers daily in hot weather Use larger pots when possible to hold more moisture Add compost to improve water retention Mulch the top of containers with straw or shredded leavesDuring heat waves, some containers may need water once in the morning and once in late afternoon. Common Watering Mistakes Watering a Little Every Day This trains shallow roots and creates weak plants. Switch to deeper, less frequent watering. Letting Soil Swing from Bone-Dry to Waterlogged Inconsistent moisture causes cracking fruit, blossom end rot risk, and plant stress. Watering Leaves Instead of Soil Wet leaves are not useful hydration. Roots need the water. Ignoring Mulch A 2-3 inch mulch layer can dramatically reduce evaporation and smooth out moisture swings. Simple Weekly Watering Framework Use this as a starting point and adjust for weather:Cool spring weather: 1 deep watering per week Mild summer weather: 2 deep waterings per week Heat waves or sandy soil: 3 deep waterings per weekAfter heavy rain, pause watering and recheck soil moisture before resuming. Final Takeaway Great gardeners do not water more, they water smarter. Check moisture, water deeply, and keep a consistent rhythm. Within a few weeks, you should notice sturdier plants, fewer stress symptoms, and better harvests. If you only change one thing this season, change how you water. Start with one bed this week and build the habit from there. Related ReadingMulching for Healthier Garden Beds: A Practical Guide Growing Tomatoes: From Seed to Sauce
- 01 Feb, 2026
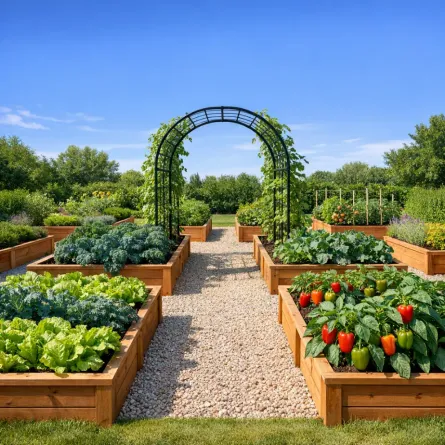
Raised Bed Gardening: Build, Fill, and Grow Your Best Garden Yet
If I could give one piece of advice to a new gardener, it would be this: build a raised bed. Raised beds changed everything for me. They gave me control over my soil, saved my back and knees, and made the whole garden easier to manage without marathon work sessions. Why Raised Beds? Raised beds offer so many advantages over traditional in-ground gardening:Better soil control: You fill them with the perfect growing mix Improved drainage: No more waterlogged roots Less bending and kneeling: Your back will thank you Fewer weeds: Elevated beds are easier to keep weed-free Longer growing season: Soil warms up faster in spring Neat, organized appearance: They make any yard look intentional Accessibility: Can be built at any height for wheelchair or limited-mobility gardeningChoosing the Right Material Wood The most popular choice, and for good reason.Cedar or redwood: Naturally rot-resistant, lasts 10-15 years. My go-to! Douglas fir or pine: More affordable, lasts 5-7 years without treatment Avoid: Treated lumber from before 2004 (may contain arsenic). Modern pressure-treated wood is considered safe, but I stick with untreated for food growingOther MaterialsCorrugated metal: Modern look, lasts decades, heats up quickly in summer Stone or brick: Beautiful and permanent, but expensive and labor-intensive Concrete blocks: Affordable and sturdy, easy to stack Composite lumber: Long-lasting but pricierThe Ideal Dimensions Getting the size right makes all the difference: Width 4 feet maximum. This lets you reach the center from either side without stepping on the soil. If the bed is against a wall or fence, keep it to 2-3 feet wide. Length Whatever works for your space! Common lengths are 4, 6, or 8 feet. Keep in mind that longer beds need extra support to prevent the sides from bowing outward. DepthDepth Best For6 inches Lettuce, herbs, radishes, shallow-rooted crops12 inches Most vegetables, including tomatoes, peppers, and beans18-24 inches Root vegetables like carrots, potatoes, and deep-rooted plants24+ inches Tabletop gardening, wheelchair accessibilityI recommend going with at least 12 inches. It gives you the flexibility to grow almost anything. Building a Simple Raised Bed Here's how I build my favorite 4x8 foot cedar bed: Materials4 cedar boards (2"x12"x8') 4 cedar posts (4"x4"x12") for corners 3-inch exterior wood screws Landscape fabric or cardboard for the bottomStepsCut your boards: Two at 8 feet, two at 4 feet (or have the lumber yard do it) Attach corner posts: Screw posts to the inside corners of the end boards Attach long sides: Screw the 8-foot boards to the corner posts Level the site: Remove grass and level the ground where the bed will sit Place the bed: Set it on the leveled ground and check with a level Line the bottom: Lay cardboard or landscape fabric to suppress weedsThat's it! A basic bed takes about an hour to build. The Perfect Fill: Soil Mix What goes inside your raised bed matters more than the bed itself. Don't just fill it with dirt from your yard! My Favorite Mix50% quality topsoil: The base of your growing medium 30% compost: Nutrient-rich and teeming with beneficial microbes 20% aeration material: Perlite, aged bark, or coarse vermiculiteHow Much Do You Need? For a 4x8 foot bed that's 12 inches deep: You need approximately 32 cubic feet of soil mix. That's about 1 cubic yard. Most garden centers sell soil by the cubic yard, and for multiple beds, bulk delivery is much more economical than bags. Filling TipsFill to the very top, the soil will settle 1-2 inches over the first few weeks Water the soil thoroughly after filling and let it settle before planting Top up with compost each springWhat to Plant in Your Raised Beds Raised beds are perfect for intensive planting. You can space plants closer together than in-ground gardens because the soil is loose and nutrient-rich. Square Foot Gardening One of the best methods for raised beds! Divide your bed into 1-foot squares and plant each square with a different crop:Spacing Crops1 per square foot Tomatoes, peppers, eggplant, broccoli4 per square foot Lettuce, kale, Swiss chard, basil9 per square foot Bush beans, spinach, beets, turnips16 per square foot Radishes, carrots, onions, chivesA Sample 4x8 Bed Plan Here's one of my favorite layouts for a beginner's raised bed:Row 1: Cherry tomato + basil interplanted Row 2: Peppers with parsley on each end Row 3: Lettuce mix with radishes (ready before the lettuce needs space) Row 4: Bush beans Row 5: Zucchini (1 plant, it'll fill the space!) Row 6: Herbs: chives, thyme, and oregano along the edgeMaintaining Your Raised Beds Watering Raised beds dry out faster than in-ground gardens. Plan to water more frequently, especially in summer. A soaker hose or drip irrigation system is a worthwhile investment. This watering guide can help you set a practical routine. Mulching Always mulch your raised beds! A 2-3 inch layer of straw, wood chips, or shredded leaves:Conserves moisture Suppresses weeds Regulates soil temperature Adds organic matter as it breaks downSeasonal CareSpring: Top dress with 1-2 inches of compost, check for wood rot or damage Summer: Keep up with watering and mulching Fall: Clean out spent crops, plant a cover crop or add a thick layer of leaves Winter: Let the bed rest, the soil organisms will keep working beneath the surfaceCommon Mistakes to AvoidMaking beds too wide: You should never have to step on the soil Skimping on soil quality: This is where your money should go Forgetting drainage: Don't place beds on concrete without drainage solutions Overcrowding: Even in rich soil, plants need space for air circulation Neglecting the paths: Mulch or gravel between beds keeps things tidy and mud-freeMy Raised Bed Journey I started with a single 4x8 cedar bed five years ago. That first summer, I grew more tomatoes and lettuce in that small space than I ever managed in my old in-ground rows. Now I have six raised beds, and each one brings me joy. There's something deeply satisfying about those neat wooden frames overflowing with healthy plants. If you're on the fence, start with one simple bed and learn by doing. One bed is plenty to begin, especially if your energy comes in shorter bursts. Related ReadingStarting Your First Vegetable Garden: A Beginner's Complete Guide Mulching for Healthier Garden Beds: A Practical Guide
- 15 Jan, 2026
Starting Your First Vegetable Garden: A Beginner's Complete Guide
There is nothing quite like the taste of a tomato you've grown yourself, still warm from the sun. If you've been thinking about starting a vegetable garden but feeling behind, you are not behind. You can start small and still have a beautiful first season. Choosing the Perfect Spot The first step to a successful vegetable garden is finding the right location. Most vegetables need at least 6-8 hours of direct sunlight per day. Take a few days to observe your yard and note where the sun hits throughout the day. Look for a spot that:Gets plenty of morning sun (it dries the dew and reduces disease) Has good drainage (vegetables hate wet feet!) Is close to a water source Is protected from strong windsStart Small, Dream Big One of the biggest mistakes new gardeners make is starting too big. Trust me, I've been there! A 4x4 foot raised bed or a few containers is the perfect starting size. You can always expand next year once you've got the hang of it."The love of gardening is a seed once sown that never dies." - Gertrude JekyllEasy Vegetables for Beginners Here are my top picks for first-time gardeners:Lettuce and salad greens: Quick to grow, forgiving, and you can harvest leaves as you need them Tomatoes: Nothing beats homegrown! Start with cherry tomatoes for easy success Zucchini: Almost impossible to fail, and incredibly productive Herbs (basil, mint, parsley): Grow in small spaces and add so much flavor to your cooking Radishes: Ready to harvest in just 25-30 days!Preparing Your Soil Good soil is the foundation of a healthy garden. If you're starting with existing garden beds, work in plenty of compost to improve soil structure and add nutrients. For raised beds, I recommend a mix of:60% topsoil 30% compost 10% aeration material (perlite or aged bark)When to Plant Timing is everything in the garden. Check your local frost dates and plan accordingly. Cool-season crops like lettuce and peas can go in early spring, while warm-season crops like tomatoes and peppers should wait until after the last frost. If you want a full month-by-month checklist, see Spring Garden Planning. My Final Tip Don't be afraid to make mistakes. They're the best teachers. Every season, I still learn something new in my garden, and you will too. Related ReadingRaised Bed Gardening: Build, Fill, and Grow Your Best Garden Yet Container Gardening: Growing Big Harvests in Small Spaces
- 05 Jan, 2026
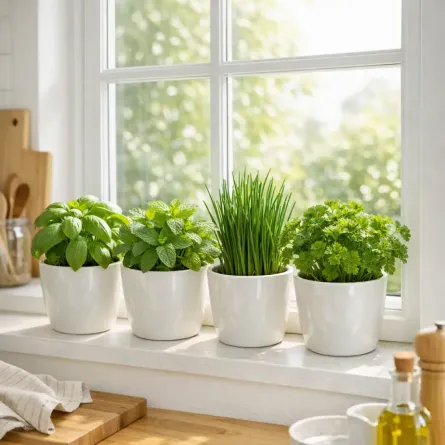
Growing Herbs on Your Windowsill: Fresh Flavors Year-Round
Not everyone has a backyard garden, and that is perfectly okay. Some of my sweetest garden moments happen right at the kitchen sink, snipping herbs from the windowsill while dinner simmers. If your outdoor space is limited, this is still very much real gardening. Why Grow Herbs Indoors?Fresh herbs whenever you need them: No more wilted supermarket bundles! Cost savings: A single basil plant produces more than a dozen store-bought packages No outdoor space required: A sunny window is all you need Year-round growing: Even in the depths of winter It's therapeutic: A little green in your kitchen lifts the spiritsThe Best Herbs for Windowsill Growing Not all herbs thrive indoors equally. Here are my top picks: Easy Herbs (Start Here!) Mint: Nearly impossible to kill. It actually does better contained in a pot!Light: 4-6 hours Water: Keep consistently moist Tip: Pinch regularly to encourage bushy growthBasil: The queen of the herb gardenLight: 6-8 hours (south-facing window ideal) Water: When top inch is dry Tip: Harvest from the top to promote branchingChives: Forgiving and flavorfulLight: 4-6 hours Water: Moderate Tip: Cut to 2 inches above soil when harvestingParsley: Slow to start but productiveLight: 4-6 hours Water: Keep evenly moist Tip: Start from nursery transplants for faster resultsIntermediate Herbs Cilantro: A bit trickier, but worth itLight: 4-6 hours (prefers cooler temps) Water: Keep moist Tip: Sow successively as it bolts quicklyOregano: Mediterranean vibes in your kitchenLight: 6-8 hours Water: Let dry between waterings Tip: Needs excellent drainageThyme: Compact and aromaticLight: 6 hours Water: Let dry between waterings Tip: Good air circulation prevents mildewSetting Up Your Windowsill Garden Choosing Containers Look for pots with drainage holes. This is non-negotiable! Herbs hate soggy roots. I love using:Terracotta pots (breathable, but dry out faster) Ceramic pots with drainage Recycled containers (make your own holes)Size matters: most herbs do well in 6-inch pots. Mint and basil appreciate 8-inch or larger. The Right Soil Use a quality potting mix, not garden soil, which compacts and doesn't drain well indoors. I add a handful of perlite to improve drainage. Light Requirements Here's the truth: most windowsills don't provide quite enough light for herbs. If your herbs are:Leggy and stretching toward the window Pale green instead of vibrant Growing slowlyConsider supplementing with a small grow light. LED grow lights are affordable and make a huge difference. Watering Wisdom Overwatering is the #1 killer of indoor herbs. Follow these guidelines:Stick your finger in the soil and water when the top inch is dry Water thoroughly until it drains from the bottom Never let pots sit in water Morning watering is bestHarvesting Tips The more you harvest, the more your herbs grow! Here's how:Basil: Pinch off leaves from the top, just above a leaf pair Mint: Cut stems just above a leaf node Parsley & Cilantro: Harvest outer stems first, leaving the center to grow Chives: Snip with scissors, leaving 2 inches Thyme & Oregano: Cut sprigs as needed, never more than 1/3 of the plantCommon Problems & Solutions Yellow leaves: Usually overwatering. Check drainage and let soil dry more between waterings. Leggy growth: Not enough light. Move to brighter window or add grow light. Brown leaf tips: Often low humidity. Group plants together or use a pebble tray. Pests (aphids, fungus gnats): Isolate affected plant, spray with diluted neem oil solution. My Favorite Windowsill Setup Right now, my kitchen windowsill holds:A big pot of basil (I go through so much!) Mint in its own container (it would take over otherwise) A mixed pot of parsley and chives Thyme and oregano sharing a terracotta potI rotate them seasonally and start new plants from seed or cuttings to keep the supply fresh. Start Today! You do not need a green thumb or fancy equipment. Start with one pot of basil or mint, give it good light and appropriate water, and build from there. One pot on one sunny sill is enough to begin. Related ReadingContainer Gardening: Growing Big Harvests in Small Spaces Starting Your First Vegetable Garden: A Beginner's Complete Guide Shade Gardening for Vegetables: What Grows with Less Sun
- 28 Dec, 2025
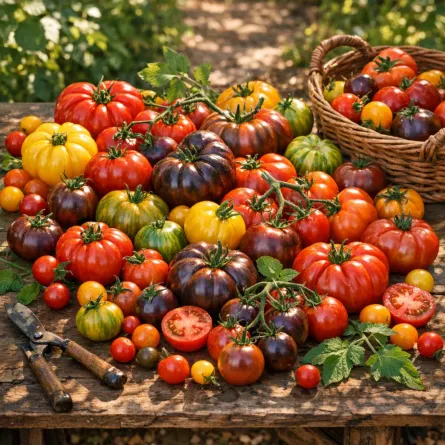
Growing Tomatoes: From Seed to Sauce
Tomatoes are the crown jewels of my summer garden. Nothing compares to a sun-warmed tomato eaten right outside, juice on your fingers and all. It really is a different fruit from store tomatoes. Here's what I've learned over the years, including a few lessons I learned the hard way. Choosing Your Tomato Varieties Determinate vs. Indeterminate Determinate (Bush) tomatoes:Compact, bushy growth (3-4 feet) Fruit ripens all at once Great for containers and small spaces Good for canning and preserving Examples: Roma, Celebrity, Bush Early GirlIndeterminate (Vining) tomatoes:Continuous growth (6-10+ feet) Produce fruit all season until frost Need sturdy support Best for fresh eating Examples: Cherokee Purple, Brandywine, Sun GoldMy Favorite VarietiesCherry: Sun Gold (sweet and prolific), Black Cherry (complex flavor) Slicing: Cherokee Purple (heirloom perfection), Big Beef (reliable producer) Paste: San Marzano (sauce heaven), Amish Paste (meaty and flavorful) Container: Tumbling Tom, Patio PrincessStarting Tomatoes From Seed Start seeds indoors 6-8 weeks before your last frost date.Sow seeds ¼ inch deep in seed-starting mix Keep warm (70-80°F). A heat mat helps enormously Provide strong light once sprouted Transplant to larger pots when first true leaves appear Keep soil consistently moist but not soggyFrom Transplants If you buy nursery starts:Look for stocky, deep green plants Avoid leggy or flowering plants Check for pests and disease signsPlanting Out Timing Wait until:Night temperatures consistently above 50°F Soil temperature at least 60°F 1-2 weeks after last frost dateThe Deep Planting Secret Here's my best tomato tip: plant them deep! Remove the lower leaves and bury the stem up to the top set of leaves. Tomatoes root along their stems, creating a stronger, more robust plant. SpacingDeterminate: 2-3 feet apart Indeterminate: 3-4 feet apart Rows: 4-5 feet apartSupport Systems Tomatoes need support. Options include: Cages: Easy but need to be sturdy (those flimsy cone cages aren't enough for indeterminate types) Stakes: Traditional method, requires regular tying String trellising: Commercial technique, very effective for indeterminate varieties Florida weave: Great for rows, uses stakes and twine Care Throughout the Season WateringDeep, consistent watering is key (1-2 inches per week) Water at soil level, not on leaves Mulch to retain moisture Inconsistent watering causes blossom end rot and cracking. For a full routine, see How to Water a Vegetable Garden the Right WayFeedingSide-dress with compost when fruits start forming Use balanced fertilizer, not too much nitrogen (causes lots of leaves, few fruits) Stop fertilizing when plants are loaded with fruitPruning (Indeterminate Types) Remove suckers (the shoots that grow in the "armpit" between the main stem and branches) for:Better air circulation Larger fruits Easier managementI let 2-3 main stems develop and remove the rest. Common Problems Blossom End Rot Symptom: Dark, sunken spots on fruit bottomsCause: Calcium uptake issues, usually from inconsistent wateringSolution: Mulch, water consistently, don't over-fertilize Early/Late Blight Symptom: Brown spots on leaves, spreading upwardCause: Fungal diseasesSolution: Remove affected leaves, improve air circulation, mulch, avoid overhead watering Tomato Hornworms Symptom: Large green caterpillars defoliating plantsSolution: Hand-pick (they're actually easy to spot!), attract parasitic wasps Cracking Symptom: Cracks radiating from stemCause: Irregular watering, especially heavy rain after dry spellSolution: Consistent watering, harvest at first sign of cracking Harvesting and Storing When to PickColor is fully developed Slight give when gently squeezed Easily detaches from vineFor best flavor, let tomatoes ripen on the vine. But if frost threatens or pests are a problem, pick at "breaker stage" (just starting to color) and ripen indoors. Storage Never refrigerate tomatoes! Cold temperatures destroy flavor and texture. Store at room temperature, stem-side down. End of Season When frost approaches:Pick all remaining tomatoes Green tomatoes will ripen indoors (place in paper bag with a banana) Make fried green tomatoes or green tomato salsa with truly unripe onesMy Tomato Journey I grow about 15-20 tomato plants each year: cherries for snacking, slicers for sandwiches, and paste tomatoes for sauce. There's nothing like spending a late summer day turning that harvest into jars you'll open in the middle of winter. The first ripe tomato of the season is always a celebration. I slice it thick, add a little salt, and eat it standing right there in the garden. If this is your first tomato year, that first bite makes every wobble worth it. Related ReadingNatural Pest Control: Protecting Your Garden Without Chemicals Companion Planting: Friends and Foes in Your Garden Summer Heat Heroes: Vegetables That Thrive in Hot Weather Common Garden Diseases: Identify, Prevent, and Treat Naturally