Seed Saving for Beginners: Keep the Best from This Year for Next Year
- 16 Mar, 2026
The first time I saved seeds, I felt a little ridiculous about how proud I was. It was just a labeled envelope of marigold seeds tucked in a kitchen drawer, and I looked at it like treasure.
But that tiny envelope grew into one of my favorite garden habits.
Seed saving is practical, yes. It can save money, preserve varieties you love, and help plants adapt over time to your garden. But it is also deeply satisfying. You close the loop from seed to plant and back to seed again.
If you are new to this, start simple. You do not need to save seeds from everything your first year.
Why Save Seeds?
A few reasons I keep doing it:
- Lower costs over time
- Keeps favorite varieties in rotation
- Builds resilience with plants adapted to your conditions
- Feels meaningful to carry the season forward
One note right away: seed saving is easiest and most reliable with open-pollinated and heirloom varieties.
Know What Not to Save (Yet)
You can save seeds from hybrid plants, but they often will not grow “true” next season. That means the new plants may be different in size, flavor, productivity, or color.
For best beginner success:
- Choose open-pollinated varieties
- Label plants at planting time so you remember what they are
Easiest Crops to Start With
If you are anything like me, quick wins keep the motivation up.
Beans and Peas
These are wonderfully easy.
- Leave healthy pods on the plant until they dry fully.
- Harvest when pods are papery and brittle.
- Shell and remove damaged seeds.
- Let seeds air-dry another few days indoors.
Store in a cool, dry place.
Lettuce
Let one or two plants bolt and flower. After flowering, fluffy seed heads form.
- Collect when heads look dry and feathery
- Rub gently between fingers to release seed
- Separate as much chaff as practical
Not glamorous, but very doable.
Marigolds and Zinnias
Perfect for beginners and very forgiving.
- Wait until blooms are fully dry on the plant
- Pull seed heads and break apart over a bowl
- Remove moisture-prone petals/debris before storage
My first saved marigolds came up like little old friends the next spring.
Tomatoes: Slightly More Steps, Still Worth It
Tomatoes need fermentation to remove the gel coating around the seed.
Simple Tomato Seed Process
- Scoop seeds and gel into a jar with a little water.
- Let sit 2-4 days at room temperature, stirring daily.
- Once a light mold forms, add water and pour off floating pulp.
- Rinse good seeds that sink.
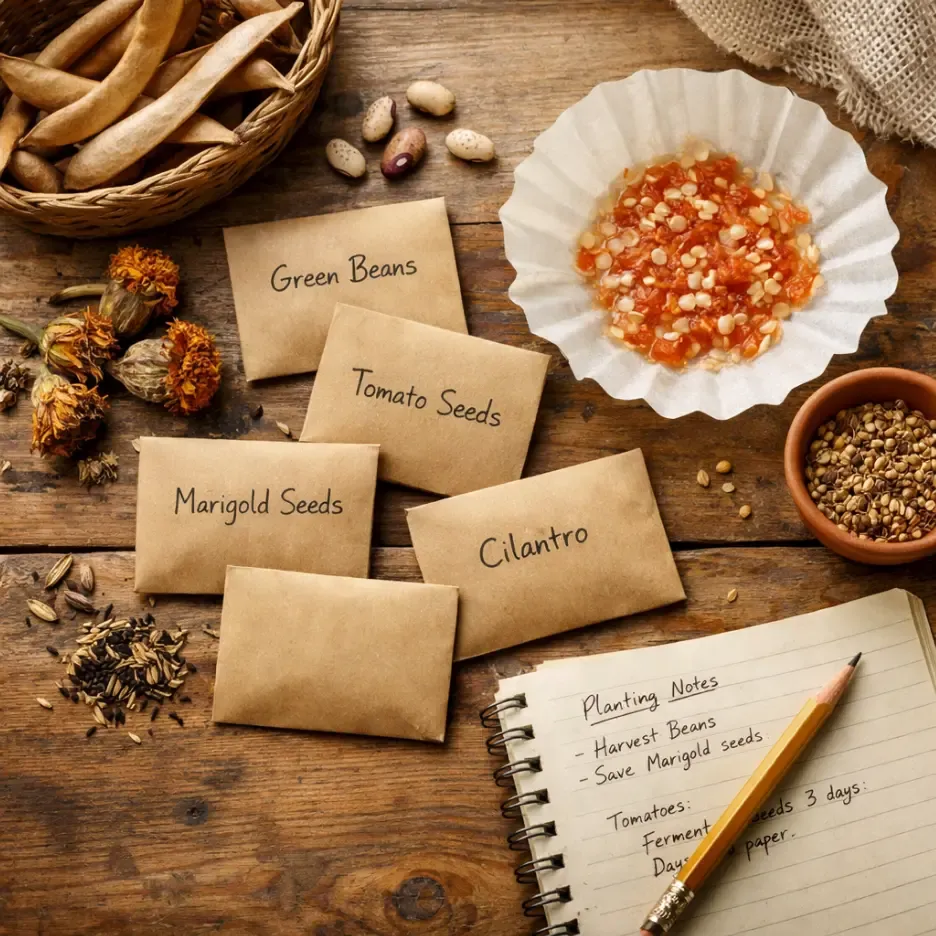
- Spread seeds on a plate or coffee filter to dry completely (about 5-7 days).
Label clearly with variety and year.
If tomatoes are your main crop, pair this with your existing Growing Tomatoes Guide so you can track which varieties truly earn a repeat spot.
Keep Seeds Dry, Dark, and Cool
Storage matters as much as collection.
My simple setup:
- Paper envelopes for each variety
- Envelopes inside a sealed glass jar
- Jar stored in a cool closet
- Silica packet or dry rice pouch nearby for humidity control
What I write on every envelope:
- Variety name
- Crop type
- Date saved
- Notes (flavor, vigor, disease issues)
That little note line helps so much when planning spring sowing.
Common Mistakes (I Have Made Most of These)
- Storing seeds before fully dry
- Forgetting labels (you will not “definitely remember”)
- Saving from weak or diseased plants
- Mixing varieties accidentally
If a batch fails, do not take it personally. Seed saving is a skill, and each season teaches you something.
How Long Seeds Usually Last
General home-storage ranges:
- Beans and peas: 3-5 years
- Tomatoes: 4-6 years
- Lettuce: 2-4 years
- Marigolds/zinnias: 2-5 years
Viability depends on storage conditions. If in doubt, do a quick germination test before planting season.
Quick Germination Test
- Place 10 seeds on a damp paper towel.
- Fold and place inside a loosely sealed bag.
- Keep warm and check after several days.
- Count how many sprout.
If 8 out of 10 sprout, you are around 80% germination. Easy math, very helpful.
A Gentle First-Year Seed-Saving Plan
If you want a calm start, try this:
- Save one flower (marigold or zinnia)
- Save one easy vegetable (bean or pea)
- Save one “stretch” crop (tomato)
That is enough to build confidence and keep it enjoyable.
Last fall, I sat at my kitchen table with a cup of tea and a stack of little seed envelopes, labeling them while rain tapped at the windows. It felt old-fashioned in the best way, like I was writing a note to next spring.
Start with one packet this year. One is plenty. By next season, when those saved seeds wake up in your soil, you will understand exactly why gardeners get attached to this process.