Showing Posts From
Vegetables
- 26 Mar, 2026
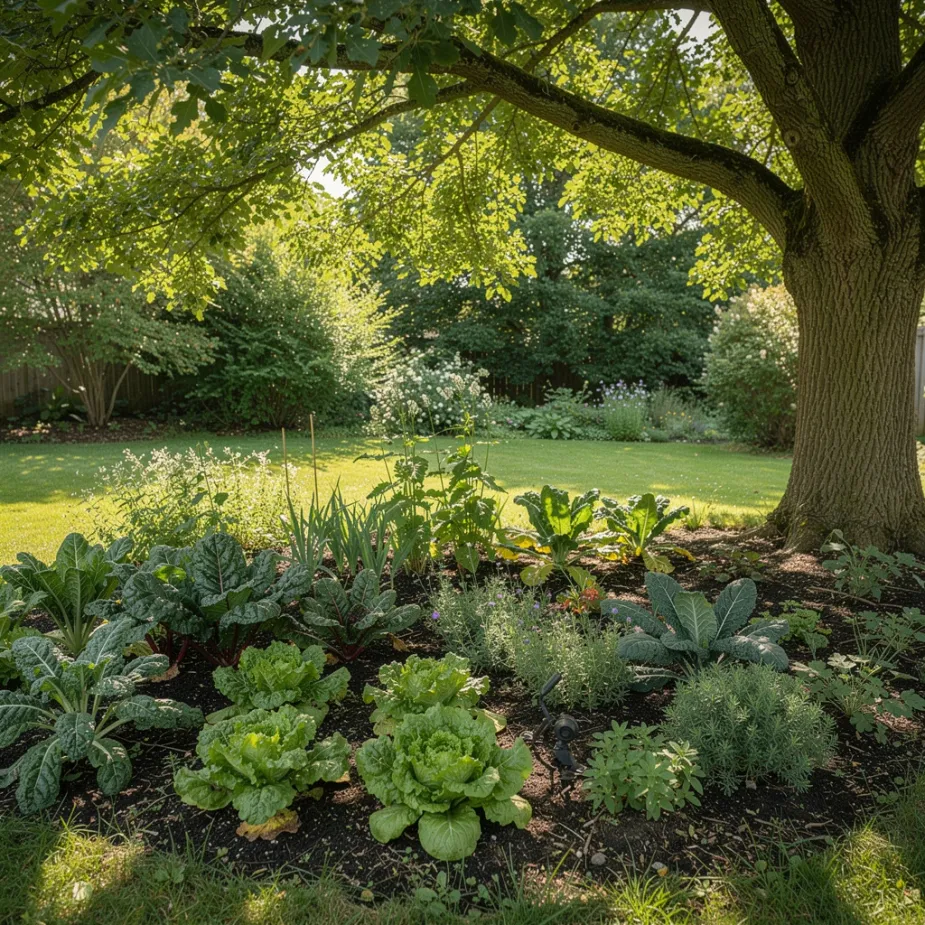
Shade Gardening for Vegetables: What Grows with Less Sun
If your yard gets perfect all-day sun, I am happy for you and just a little jealous. Mine has mature trees, awkward angles, and that one bed that gets beautiful morning light and then basically takes a nap. The good news: you can still grow a lot in partial shade. How Much Sun Counts as Partial Shade For vegetables, partial shade usually means about 3-6 hours of direct sun, plus bright indirect light. In general:6+ hours: many fruiting crops can work 4-6 hours: focus on leafy crops and quick roots Under 4 hours: choose herbs, greens, and manage expectationsBest Vegetables for Shadier Spots Most ReliableLettuce Spinach Arugula Swiss chard Kale Mustard greensAlso Worth TryingBeets (especially for greens and baby roots) Radishes Green onions Peas (especially with cool weather) Some herbs like parsley, cilantro, and mintRoot crops can still work, just usually a bit slower than in full sun. Crops That Need More Sun These generally want stronger light for top yield:Tomatoes Peppers Eggplant Melons Most winter squashIf you grow them in partial shade, lower expectations and choose compact or early-maturing varieties. Layout Tricks That HelpPut tallest crops where they will not shade shorter ones Use reflective light from pale walls or fences when possible Grow sun-lovers in containers so you can move them to brighter spots Keep paths clear so airflow reduces disease risk in cooler shade pocketsFor container strategy, see Container Gardening: Growing Big Harvests in Small Spaces. Watering and Soil in Shade Beds Shade beds often stay moist longer.Check soil before watering, do not water by habit Use compost to improve structure and root health Mulch lightly to keep moisture even without creating soggy conditionsA careful routine from How to Water a Vegetable Garden the Right Way is especially helpful here. A Realistic Harvest Mindset Shade gardens usually produce fewer fruits and more greens. That is not failure. It is just a different style of abundance. Some of my most dependable salad harvests come from my "not ideal" beds. I remember one sticky July evening, knees grumbling as usual, cutting a big bowl of lettuce from a bed that only sees morning sun. I laughed out loud because that bed had proved me wrong again. If your space is shady, start with greens and herbs. Get one reliable win, then expand from there. Related ReadingContainer Gardening: Growing Big Harvests in Small Spaces How to Water a Vegetable Garden the Right Way Root Vegetables for Beginners: Carrots, Beets, Radishes, and Turnips
- 22 Mar, 2026
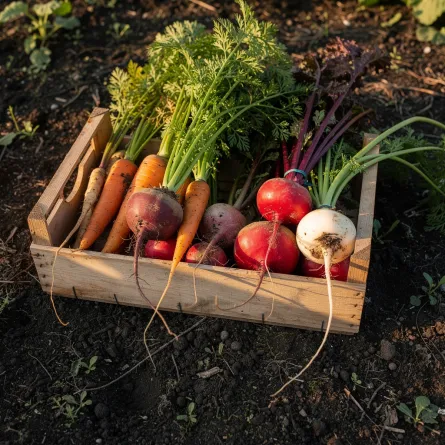
Root Vegetables for Beginners: Carrots, Beets, Radishes, and Turnips
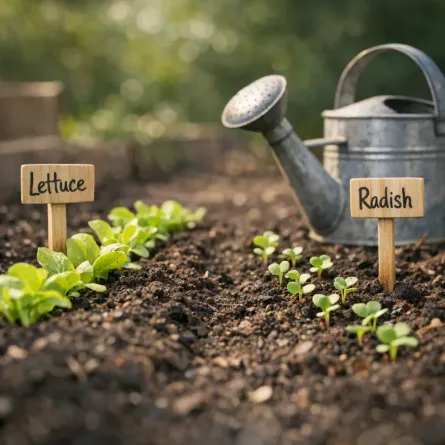
Root crops taught me patience. You do all this work and then wait for weeks with almost nothing to look at above ground. But when you pull that first good carrot, it feels like a tiny miracle. If root vegetables have disappointed you before, you are not alone. Most trouble comes down to timing, soil texture, and thinning. Best Root Crops to Start With If you are new, begin with these four:Radishes: Fast and forgiving Beets: Reliable and dual-purpose (roots plus greens) Turnips: Great in cool weather Carrots: A little fussier, but worth itPlant small batches every 2-3 weeks for a steady harvest. Soil Prep Matters More Than Fertilizer Root crops need loose, stone-free soil so roots can grow straight.Remove rocks and clumps from top 8-10 inches Mix in finished compost, not fresh manure Avoid high-nitrogen fertilizer before sowing Keep soil consistently moist during germinationFresh manure or heavy nitrogen tends to produce lots of leafy tops and misshapen roots. Planting Timing Root vegetables prefer cool weather. SpringSow as soon as soil can be worked and temperatures are mild Keep rows moist until seedlings establishFallStart 8-10 weeks before first expected frost Cool nights improve sweetness in many rootsFor season mapping, pair this with Spring Garden Planning: Getting Ready for the Growing Season and Fall Vegetable Gardening: What to Plant and When. The Most Ignored Step: Thinning I know thinning feels wasteful, but crowded seedlings produce tiny roots.Radishes: 1-2 inches apart Beets: 3-4 inches apart Turnips: 3-4 inches apart Carrots: 2-3 inches apartThin in stages if that feels easier on the heart. Watering for Better Roots Inconsistent moisture causes splitting, toughness, and uneven growth.Aim for steady moisture, not soggy soil Water deeply when top inch dries out Mulch lightly once seedlings are establishedUse How to Water a Vegetable Garden the Right Way if you want a full watering framework. Common Problems and Quick FixesProblem Likely Cause Quick FixForked carrots Compacted or rocky soil Loosen soil deeper and screen out stonesTiny roots Overcrowding Thin earlier and more aggressivelySplit roots Uneven watering Keep moisture consistentBitter flavor Heat stress or over-maturity Harvest younger and mulch betterPoor germination Dry seedbed Keep top layer evenly moist until sproutedHarvest WindowsRadishes: Often ready in 3-5 weeks Baby beets/turnips: About 5-7 weeks Full carrots: Depends on variety, often 10+ weeksDo not wait too long "for bigger roots." Many get woody if left too long in heat. My Root-Crop Habit I keep a little packet box by the back door and direct-sow a short row whenever I have 15 spare minutes. That tiny habit gives me far more roots than one big all-at-once planting. If your garden feels overwhelming, start with one row of radishes this week. Small starts still count. Related ReadingSpring Garden Planning: Getting Ready for the Growing Season Fall Vegetable Gardening: What to Plant and When How to Water a Vegetable Garden the Right Way
- 18 Mar, 2026
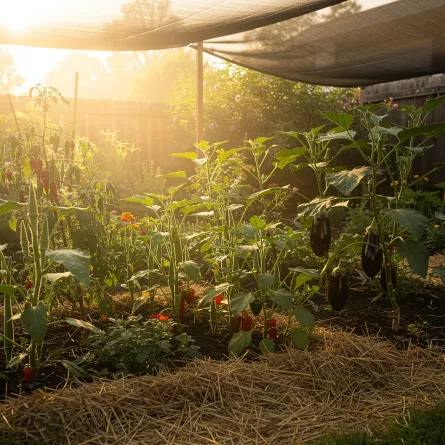
Summer Heat Heroes: Vegetables That Thrive in Hot Weather
If your garden turns into a crispy little panic zone in July, you are not doing anything wrong. Some summers feel like standing in front of an open oven. I used to think the whole season was doomed once daytime temps sat above 90F, but a few smart crop choices changed everything. The trick is simple: grow vegetables that like heat and protect the rest with good routines. Heat-Tolerant Crops That Keep Going These are my reliable summer workhorses:Okra: Loves heat and keeps producing when many plants sulk Southern peas (cowpeas/black-eyed peas): Tough, productive, and forgiving Sweet potatoes: Vigorous growth once the soil warms up Malabar spinach: Not true spinach, but wonderful in heat Yardlong beans: Productive climber in hot weather Eggplant: Thrives when nights stay warm Peppers: Better performance with steady moisture and mulchIf you have room, plant at least two of these every year. That way, even in rough weather, you still bring in harvests. Watering in Heat Without Wasting Water Hot-weather watering is about consistency, not panic.Water deeply 2-3 times per week instead of shallow daily sprinkles Water early in the morning so roots are charged before afternoon heat Target soil, not leaves, to reduce disease pressure Check moisture 2 inches down before watering againIf you want a full foundation, pair this with How to Water a Vegetable Garden the Right Way. Mulch Is Not Optional in a Heat Wave Mulch acts like shade for your soil.Add 2-3 inches of straw, shredded leaves, or untreated grass clippings Keep mulch a little away from stems to prevent rot Replenish midsummer as it breaks downGood mulch can lower soil temperature, hold moisture, and reduce plant stress in one shot. I lean on this heavily in July. For a deeper how-to, see Mulching for Healthier Garden Beds: A Practical Guide. Simple Shade Tricks That Work Even heat-loving plants appreciate protection during extreme spells.Use 30% shade cloth over hoops during peak afternoon sun Give newly transplanted seedlings temporary shade for 3-5 days Plant taller crops on the west side to cast light afternoon shadeYou do not need a fancy setup. I have used clipped bedsheets in a pinch and saved young basil that would have fried otherwise. Signs of Heat Stress to Catch Early Watch for these before plants crash:Leaf curl during the hottest part of the day that does not recover by evening Blossom drop on tomatoes and peppers Bitter greens and bolting herbs Dull, gray-green foliage and slowed growthWhen you see this, shift to a recovery routine: deep morning water, fresh mulch, and temporary shade. A Practical Mid-Summer Reset Plan When your beds look tired, do this over one weekend:Remove dead or diseased foliage Top-dress with compost Refresh mulch Reseed quick crops in any open spaces (bush beans, basil, cucumbers) Install shade support before the next heat spikeThis reset pairs well with Late-Summer Garden Reset: What I Do When the Beds Look Tired. My Heat-Season Rule I no longer chase perfection in high summer. I chase resilience. A garden that survives a rough heat stretch and still gives you peppers, beans, and herbs is a successful garden. If your beds are struggling right now, start with one thing: mulch first. Then adjust watering. Those two changes alone can turn the season around. Related ReadingHow to Water a Vegetable Garden the Right Way Mulching for Healthier Garden Beds: A Practical Guide Late-Summer Garden Reset: What I Do When the Beds Look Tired
- 07 Mar, 2026
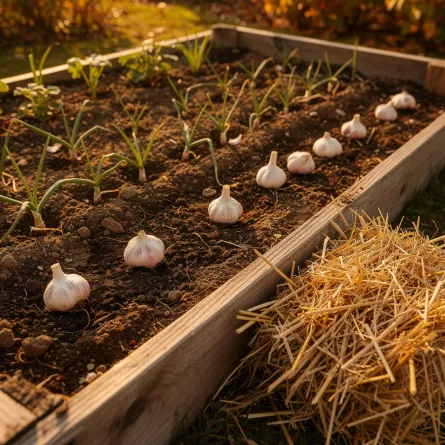
Garlic for Beginners: Plant in Fall, Harvest with a Smile
Garlic is one of those crops that makes me feel smarter than I am. You tuck cloves in the ground in fall, mostly forget about them through winter, and then pull up beautiful bulbs in summer like some kind of garden magician. If you are new to garlic, start simple. It is one of the most forgiving crops I grow. Why Garlic Is Worth GrowingUses very little space Needs less day-to-day fuss than many vegetables Stores well for months when cured properly Gives you both bulbs and optional garlic scapes (if you grow hardneck types)I started with one short row years ago because my knees were acting up and I needed a low-maintenance win. It became a yearly habit. Hardneck vs Softneck HardneckBetter flavor complexity for many cooks Produces edible scapes Often does best in colder climates Usually fewer, larger clovesSoftneckLonger storage life in many conditions No scapes Often more cloves per bulb Common in warmer regions and grocery storesIf you are unsure, ask a local grower or extension office what performs best in your area. When to Plant Garlic Garlic is usually planted in fall, about 4-6 weeks before the ground freezes hard. That timing lets roots establish before deep winter, then growth takes off in spring. For planning windows, pair this with Fall Vegetable Gardening: What to Plant and When. How to Plant Garlic (The Easy Version)Choose healthy seed garlic, not supermarket garlic Separate bulbs into cloves right before planting Plant cloves pointed end up, 2 inches deep Space 4-6 inches apart in rows about 8-12 inches apart Water in well Mulch with 3-4 inches of straw or shredded leavesDo not peel the cloves. Keep the papery wrapper on. Spring Care Once growth begins in spring:Pull weeds early so garlic is not competing Keep moisture steady, especially during bulbing Side-dress lightly with compost in early spring Remove hardneck scapes when they curl (great for pesto)If watering routines are a struggle, this guide helps: How to Water a Vegetable Garden the Right Way. When to Harvest Garlic is usually ready when lower leaves brown but upper leaves are still partly green. A common rule:Harvest when about one-third to one-half of leaves have dried downIf you wait too long, wrappers split and storage quality drops. Curing and Storage After harvest:Brush off loose soil (do not wash bulbs) Cure in a dry, airy, shaded place for 2-3 weeks Trim roots and tops after curing Store in a cool, dry spot with airflowAvoid sealed containers. Garlic likes to breathe. Common Beginner MistakesPlanting grocery garlic that may be treated or poorly adapted Planting too late in fall Overwatering in heavy soils Skipping mulch before winter Waiting too long to harvestMy Gentle Nudge If you only try one new crop this year, make it garlic. Truly. Plant one small bed this fall and let future-you enjoy that first homegrown bulb in summer. That little success feels wonderful. Related ReadingFall Vegetable Gardening: What to Plant and When Mulching for Healthier Garden Beds: A Practical Guide How to Water a Vegetable Garden the Right Way
- 12 Feb, 2026
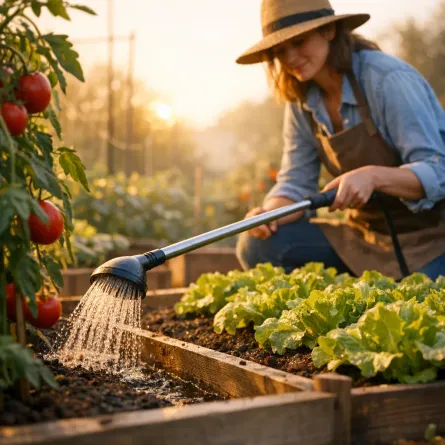
How to Water a Vegetable Garden the Right Way
Watering sounds simple until tomatoes split, lettuce bolts, or seedlings flop over in afternoon heat. I have done all three. Healthy gardens are built on steady watering habits, not panicked rescue watering. This guide will help you water with confidence so plants grow deeper roots, produce better harvests, and stay resilient through hot spells. The Core Rule: Water Deeply, Less Often Most vegetables do best with about 1 to 1.5 inches of water per week, including rainfall. Instead of light daily sprinkles, aim for deep soakings that wet the soil 6-8 inches down. Deep watering encourages roots to grow downward where the soil stays cooler and moister. Shallow watering keeps roots near the surface, where they dry out quickly. Best Time of Day to Water Morning is the best time to water your garden.Cooler temperatures mean less evaporation Leaves dry quickly after sunrise, which lowers disease risk Plants have moisture available before midday heatIf morning is not possible, water in late afternoon. Avoid watering late in the evening, especially in humid climates, because wet foliage overnight can invite fungal disease. How to Check if You Actually Need to Water Do not water by habit alone. Check the soil first:Push your finger 2-3 inches into the soil If it feels dry at that depth, water If it still feels cool and moist, wait another dayFor larger beds, use a trowel to check deeper layers. Soil can look dry on top while still holding enough moisture below. Watering Methods Ranked 1) Drip Irrigation or Soaker Hoses (Best) These methods apply water slowly at soil level, right where roots need it.Very efficient use of water Keeps foliage dry Reduces weeds between rows Easy to automate with a timer2) Hand Watering at Soil Level A watering wand or gentle nozzle works well for small gardens.Good control around young plants Useful for containers and newly transplanted seedlingsTry to avoid splashing leaves and focus on the base of each plant. 3) Overhead Sprinklers (Use Carefully) Sprinklers are convenient but can waste water and increase disease pressure.More evaporation loss Wet leaves can promote mildew and blight Encourages weeds in pathwaysIf sprinklers are your only option, run them early in the morning. Different Crops, Different Needs Not all vegetables use water the same way.Leafy greens: prefer consistently moist soil Tomatoes and peppers: like deep, steady watering, but not soggy roots Root crops: need even moisture to prevent splitting and bitterness Cucumbers and squash: heavy drinkers during fruitingPay extra attention when crops are flowering and fruiting. Water stress at this stage can reduce both quality and yield. Container Gardens Need a Different Plan Containers dry out much faster than in-ground beds, especially in summer. If you grow mainly in pots, use this container gardening guide as your companion plan.Check containers daily in hot weather Use larger pots when possible to hold more moisture Add compost to improve water retention Mulch the top of containers with straw or shredded leavesDuring heat waves, some containers may need water once in the morning and once in late afternoon. Common Watering Mistakes Watering a Little Every Day This trains shallow roots and creates weak plants. Switch to deeper, less frequent watering. Letting Soil Swing from Bone-Dry to Waterlogged Inconsistent moisture causes cracking fruit, blossom end rot risk, and plant stress. Watering Leaves Instead of Soil Wet leaves are not useful hydration. Roots need the water. Ignoring Mulch A 2-3 inch mulch layer can dramatically reduce evaporation and smooth out moisture swings. Simple Weekly Watering Framework Use this as a starting point and adjust for weather:Cool spring weather: 1 deep watering per week Mild summer weather: 2 deep waterings per week Heat waves or sandy soil: 3 deep waterings per weekAfter heavy rain, pause watering and recheck soil moisture before resuming. Final Takeaway Great gardeners do not water more, they water smarter. Check moisture, water deeply, and keep a consistent rhythm. Within a few weeks, you should notice sturdier plants, fewer stress symptoms, and better harvests. If you only change one thing this season, change how you water. Start with one bed this week and build the habit from there. Related ReadingMulching for Healthier Garden Beds: A Practical Guide Growing Tomatoes: From Seed to Sauce
- 15 Jan, 2026
Starting Your First Vegetable Garden: A Beginner's Complete Guide
There is nothing quite like the taste of a tomato you've grown yourself, still warm from the sun. If you've been thinking about starting a vegetable garden but feeling behind, you are not behind. You can start small and still have a beautiful first season. Choosing the Perfect Spot The first step to a successful vegetable garden is finding the right location. Most vegetables need at least 6-8 hours of direct sunlight per day. Take a few days to observe your yard and note where the sun hits throughout the day. Look for a spot that:Gets plenty of morning sun (it dries the dew and reduces disease) Has good drainage (vegetables hate wet feet!) Is close to a water source Is protected from strong windsStart Small, Dream Big One of the biggest mistakes new gardeners make is starting too big. Trust me, I've been there! A 4x4 foot raised bed or a few containers is the perfect starting size. You can always expand next year once you've got the hang of it."The love of gardening is a seed once sown that never dies." - Gertrude JekyllEasy Vegetables for Beginners Here are my top picks for first-time gardeners:Lettuce and salad greens: Quick to grow, forgiving, and you can harvest leaves as you need them Tomatoes: Nothing beats homegrown! Start with cherry tomatoes for easy success Zucchini: Almost impossible to fail, and incredibly productive Herbs (basil, mint, parsley): Grow in small spaces and add so much flavor to your cooking Radishes: Ready to harvest in just 25-30 days!Preparing Your Soil Good soil is the foundation of a healthy garden. If you're starting with existing garden beds, work in plenty of compost to improve soil structure and add nutrients. For raised beds, I recommend a mix of:60% topsoil 30% compost 10% aeration material (perlite or aged bark)When to Plant Timing is everything in the garden. Check your local frost dates and plan accordingly. Cool-season crops like lettuce and peas can go in early spring, while warm-season crops like tomatoes and peppers should wait until after the last frost. If you want a full month-by-month checklist, see Spring Garden Planning. My Final Tip Don't be afraid to make mistakes. They're the best teachers. Every season, I still learn something new in my garden, and you will too. Related ReadingRaised Bed Gardening: Build, Fill, and Grow Your Best Garden Yet Container Gardening: Growing Big Harvests in Small Spaces
- 28 Dec, 2025
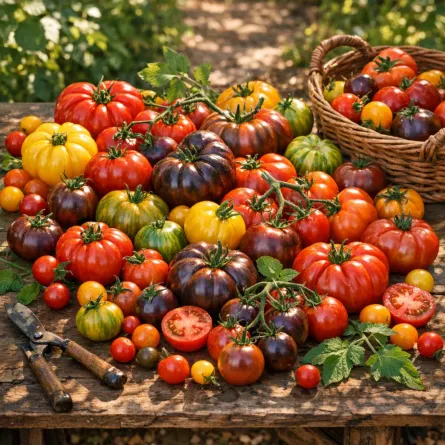
Growing Tomatoes: From Seed to Sauce
Tomatoes are the crown jewels of my summer garden. Nothing compares to a sun-warmed tomato eaten right outside, juice on your fingers and all. It really is a different fruit from store tomatoes. Here's what I've learned over the years, including a few lessons I learned the hard way. Choosing Your Tomato Varieties Determinate vs. Indeterminate Determinate (Bush) tomatoes:Compact, bushy growth (3-4 feet) Fruit ripens all at once Great for containers and small spaces Good for canning and preserving Examples: Roma, Celebrity, Bush Early GirlIndeterminate (Vining) tomatoes:Continuous growth (6-10+ feet) Produce fruit all season until frost Need sturdy support Best for fresh eating Examples: Cherokee Purple, Brandywine, Sun GoldMy Favorite VarietiesCherry: Sun Gold (sweet and prolific), Black Cherry (complex flavor) Slicing: Cherokee Purple (heirloom perfection), Big Beef (reliable producer) Paste: San Marzano (sauce heaven), Amish Paste (meaty and flavorful) Container: Tumbling Tom, Patio PrincessStarting Tomatoes From Seed Start seeds indoors 6-8 weeks before your last frost date.Sow seeds ¼ inch deep in seed-starting mix Keep warm (70-80°F). A heat mat helps enormously Provide strong light once sprouted Transplant to larger pots when first true leaves appear Keep soil consistently moist but not soggyFrom Transplants If you buy nursery starts:Look for stocky, deep green plants Avoid leggy or flowering plants Check for pests and disease signsPlanting Out Timing Wait until:Night temperatures consistently above 50°F Soil temperature at least 60°F 1-2 weeks after last frost dateThe Deep Planting Secret Here's my best tomato tip: plant them deep! Remove the lower leaves and bury the stem up to the top set of leaves. Tomatoes root along their stems, creating a stronger, more robust plant. SpacingDeterminate: 2-3 feet apart Indeterminate: 3-4 feet apart Rows: 4-5 feet apartSupport Systems Tomatoes need support. Options include: Cages: Easy but need to be sturdy (those flimsy cone cages aren't enough for indeterminate types) Stakes: Traditional method, requires regular tying String trellising: Commercial technique, very effective for indeterminate varieties Florida weave: Great for rows, uses stakes and twine Care Throughout the Season WateringDeep, consistent watering is key (1-2 inches per week) Water at soil level, not on leaves Mulch to retain moisture Inconsistent watering causes blossom end rot and cracking. For a full routine, see How to Water a Vegetable Garden the Right WayFeedingSide-dress with compost when fruits start forming Use balanced fertilizer, not too much nitrogen (causes lots of leaves, few fruits) Stop fertilizing when plants are loaded with fruitPruning (Indeterminate Types) Remove suckers (the shoots that grow in the "armpit" between the main stem and branches) for:Better air circulation Larger fruits Easier managementI let 2-3 main stems develop and remove the rest. Common Problems Blossom End Rot Symptom: Dark, sunken spots on fruit bottomsCause: Calcium uptake issues, usually from inconsistent wateringSolution: Mulch, water consistently, don't over-fertilize Early/Late Blight Symptom: Brown spots on leaves, spreading upwardCause: Fungal diseasesSolution: Remove affected leaves, improve air circulation, mulch, avoid overhead watering Tomato Hornworms Symptom: Large green caterpillars defoliating plantsSolution: Hand-pick (they're actually easy to spot!), attract parasitic wasps Cracking Symptom: Cracks radiating from stemCause: Irregular watering, especially heavy rain after dry spellSolution: Consistent watering, harvest at first sign of cracking Harvesting and Storing When to PickColor is fully developed Slight give when gently squeezed Easily detaches from vineFor best flavor, let tomatoes ripen on the vine. But if frost threatens or pests are a problem, pick at "breaker stage" (just starting to color) and ripen indoors. Storage Never refrigerate tomatoes! Cold temperatures destroy flavor and texture. Store at room temperature, stem-side down. End of Season When frost approaches:Pick all remaining tomatoes Green tomatoes will ripen indoors (place in paper bag with a banana) Make fried green tomatoes or green tomato salsa with truly unripe onesMy Tomato Journey I grow about 15-20 tomato plants each year: cherries for snacking, slicers for sandwiches, and paste tomatoes for sauce. There's nothing like spending a late summer day turning that harvest into jars you'll open in the middle of winter. The first ripe tomato of the season is always a celebration. I slice it thick, add a little salt, and eat it standing right there in the garden. If this is your first tomato year, that first bite makes every wobble worth it. Related ReadingNatural Pest Control: Protecting Your Garden Without Chemicals Companion Planting: Friends and Foes in Your Garden Summer Heat Heroes: Vegetables That Thrive in Hot Weather Common Garden Diseases: Identify, Prevent, and Treat Naturally