- 26 Mar, 2026
Shade Gardening for Vegetables: What Grows with Less Sun
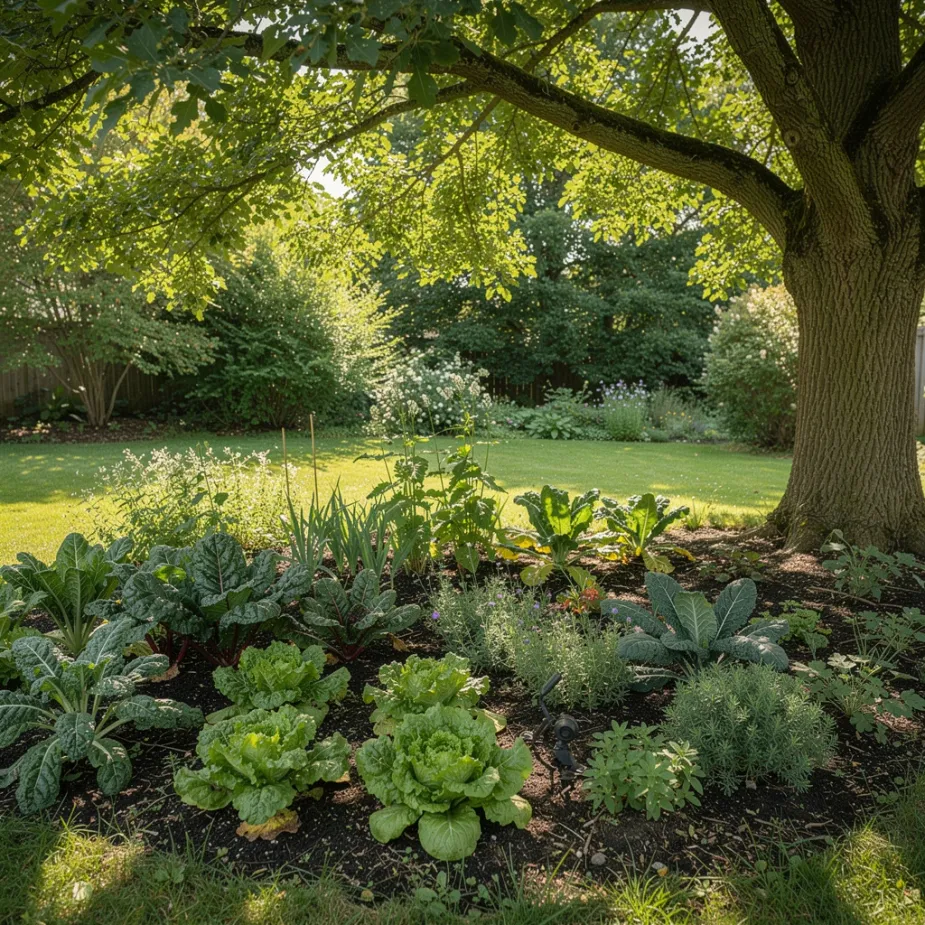
If your yard gets perfect all-day sun, I am happy for you and just a little jealous. Mine has mature trees, awkward angles, and that one bed that gets beautiful morning light and then basically takes a nap. The good news: you can still grow a lot in partial shade. How Much Sun Counts as Partial Shade For vegetables, partial shade usually means about 3-6 hours of direct sun, plus bright indirect light. In general:6+ hours: many fruiting crops can work 4-6 hours: focus on leafy crops and quick roots Under 4 hours: choose herbs, greens, and manage expectationsBest Vegetables for Shadier Spots Most ReliableLettuce Spinach Arugula Swiss chard Kale Mustard greensAlso Worth TryingBeets (especially for greens and baby roots) Radishes Green onions Peas (especially with cool weather) Some herbs like parsley, cilantro, and mintRoot crops can still work, just usually a bit slower than in full sun. Crops That Need More Sun These generally want stronger light for top yield:Tomatoes Peppers Eggplant Melons Most winter squashIf you grow them in partial shade, lower expectations and choose compact or early-maturing varieties. Layout Tricks That HelpPut tallest crops where they will not shade shorter ones Use reflective light from pale walls or fences when possible Grow sun-lovers in containers so you can move them to brighter spots Keep paths clear so airflow reduces disease risk in cooler shade pocketsFor container strategy, see Container Gardening: Growing Big Harvests in Small Spaces. Watering and Soil in Shade Beds Shade beds often stay moist longer.Check soil before watering, do not water by habit Use compost to improve structure and root health Mulch lightly to keep moisture even without creating soggy conditionsA careful routine from How to Water a Vegetable Garden the Right Way is especially helpful here. A Realistic Harvest Mindset Shade gardens usually produce fewer fruits and more greens. That is not failure. It is just a different style of abundance. Some of my most dependable salad harvests come from my "not ideal" beds. I remember one sticky July evening, knees grumbling as usual, cutting a big bowl of lettuce from a bed that only sees morning sun. I laughed out loud because that bed had proved me wrong again. If your space is shady, start with greens and herbs. Get one reliable win, then expand from there. Related ReadingContainer Gardening: Growing Big Harvests in Small Spaces How to Water a Vegetable Garden the Right Way Root Vegetables for Beginners: Carrots, Beets, Radishes, and Turnips
- 25 Mar, 2026
Succession Planting for Continuous Harvests
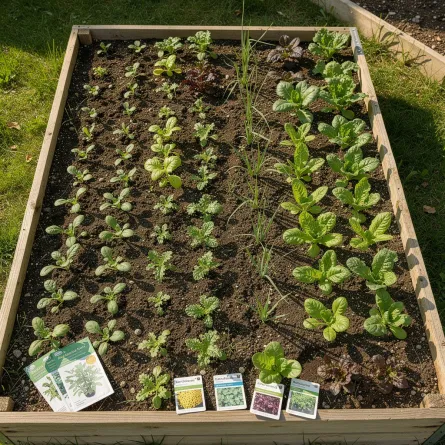
I used to plant everything in one big enthusiastic weekend and then wonder why I had either too much lettuce or none at all. Succession planting fixed that feast-or-famine cycle in my garden. Think of it as planting in waves instead of one giant push. What Succession Planting Means Succession planting is simply sowing or transplanting crops at intervals so harvests are spread out. Instead of 30 radishes maturing the same week, you plant a short row every 10-14 days and harvest steadily. Why It Helps So MuchMore consistent harvests for the kitchen Less waste from overproduction Better use of garden space all season Easier workload for planting and preservingIf your energy is limited (mine certainly is some weeks), smaller repeat tasks are easier on your body than marathon garden days. Three Easy Succession Methods 1) Same Crop, Staggered Timing Plant the same crop every 1-3 weeks. Great for:Lettuce Radishes Bush beans Cilantro2) Different Crops in the Same Space As one crop finishes, another goes in. Example:Spring spinach Summer bush beans Fall turnips3) Early, Mid, and Late Varieties Plant varieties with different maturity windows at the same time. Example for carrots:Early variety Mid-season variety Storage varietySimple Timing Framework Use days to maturity and your frost dates.Check average first and last frost dates Count backward for fall crops Add a small time buffer in fall when day length shortens Set calendar reminders every 10-14 days for quick re-sowingThis works well alongside Spring Garden Planning: Getting Ready for the Growing Season and Fall Vegetable Gardening: What to Plant and When. Beginner Succession Calendar (Example)Every 10 days: lettuce, arugula, radishes Every 14 days: bush beans (through midsummer) Monthly: carrots and beets in small blocks Late summer: re-sow cool-season greens for fallAdjust to your climate, but the pattern stays the same. Common MistakesPlanting too much in each wave Forgetting to prep replacement seedlings in time Not refreshing soil between crops Ignoring heat stress during summer sowingsA quick compost top-dress between rotations helps beds bounce back. My Practical Rule I keep seed packets in a small basket by the door and sow one short row whenever I water deeply on Sundays. That tiny routine changed my harvests more than any expensive tool ever did. If you are feeling behind, start with one crop to succession-plant this month. One is enough to learn the rhythm. Related ReadingSpring Garden Planning: Getting Ready for the Growing Season Fall Vegetable Gardening: What to Plant and When Root Vegetables for Beginners: Carrots, Beets, Radishes, and Turnips

- 24 Mar, 2026
Common Garden Diseases: Identify, Prevent, and Treat Naturally
Pests get all the attention, but disease is what has broken my heart most often in the garden. One humid week can turn healthy plants into a blotchy mess. The good news is that most disease control is not about expensive sprays. It is about prevention and fast response. Why Disease Shows Up Most garden diseases need three things:A susceptible plant A pathogen (fungus, bacteria, or virus) Favorable conditions (often moisture plus poor airflow)Break one piece of that triangle and you reduce damage. Most Common Home-Garden Diseases Powdery MildewLooks like white powder on leaves Common in squash, cucumbers, zinnias Favored by crowded growth and poor airflowEarly BlightBrown spots with rings, often on lower tomato leaves Spreads upward if unmanaged Often worsens with leaf wetness and soil splashDowny MildewYellow patches on top of leaves, gray fuzz below Moves quickly in humid weather Common in cucurbits and basilDamping Off (Seedlings)Seedlings collapse at soil line Usually from overly wet, poorly ventilated seed-starting conditionsPrevention-First Routine 1) Space Plants for Airflow Crowding is a disease invitation. Give plants enough room for leaves to dry quickly after dew or rain. 2) Water the Soil, Not the Leaves Use drip irrigation, soaker hoses, or careful hand watering low at the base. For a full watering method, see How to Water a Vegetable Garden the Right Way. 3) Mulch to Reduce Soil Splash Mulch lowers the chance of pathogens splashing onto lower leaves during rain.Straw or shredded leaves work well Maintain 2-3 inches around plants4) Remove Infected Leaves Early At first sign, prune affected leaves and discard them in trash, not compost (unless your compost system runs hot enough to kill pathogens). 5) Rotate Crop Families Do not grow tomatoes in the same bed year after year. Rotation reduces disease carryover. 6) Keep Tools Clean Wipe pruners between plants if disease is active. A quick sanitize pass can prevent spread. Natural Treatment Options When prevention is not enough, these can help limit spread:Copper-based organic fungicides (follow label exactly) Potassium bicarbonate products for some fungal issues Biological fungicides (Bacillus-based) as preventative sprays Neem oil for certain fungal pressuresAlways test sprays on a small section first and avoid spraying in hot midday sun. Quick Symptom TableSymptom Likely Disease Type First ActionWhite powder on leaves Powdery mildew Remove worst leaves, improve airflow, apply targeted sprayBrown lower-leaf spotting Early blight Prune lower leaves, mulch, avoid overhead wateringSeedlings suddenly collapse Damping off Improve airflow, reduce moisture, use sterile mixLeaf yellowing with fuzzy underside Downy mildew Remove infected foliage quickly, reduce leaf wetnessWhere Pest and Disease Management Meet Healthy, unstressed plants resist disease better. Build that foundation with compost, mulch, and beneficial insect support. Pair this guide with Natural Pest Control: Protecting Your Garden Without Chemicals and Companion Planting: Friends and Foes in Your Garden. A Realistic Mindset You can do everything right and still lose a crop in a tough season. That is gardening, not failure. What matters is spotting problems earlier each year and tightening your routine. If you want one action to start today, prune lower crowded leaves on tomatoes and add fresh mulch. Small prevention steps pay off quickly. Related ReadingNatural Pest Control: Protecting Your Garden Without Chemicals Companion Planting: Friends and Foes in Your Garden Mulching for Healthier Garden Beds: A Practical Guide
- 22 Mar, 2026
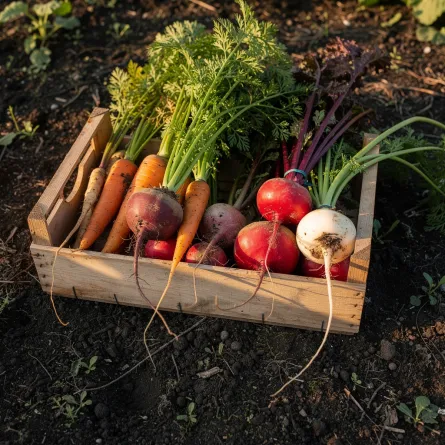
Root Vegetables for Beginners: Carrots, Beets, Radishes, and Turnips
Root crops taught me patience. You do all this work and then wait for weeks with almost nothing to look at above ground. But when you pull that first good carrot, it feels like a tiny miracle. If root vegetables have disappointed you before, you are not alone. Most trouble comes down to timing, soil texture, and thinning. Best Root Crops to Start With If you are new, begin with these four:Radishes: Fast and forgiving Beets: Reliable and dual-purpose (roots plus greens) Turnips: Great in cool weather Carrots: A little fussier, but worth itPlant small batches every 2-3 weeks for a steady harvest. Soil Prep Matters More Than Fertilizer Root crops need loose, stone-free soil so roots can grow straight.Remove rocks and clumps from top 8-10 inches Mix in finished compost, not fresh manure Avoid high-nitrogen fertilizer before sowing Keep soil consistently moist during germinationFresh manure or heavy nitrogen tends to produce lots of leafy tops and misshapen roots. Planting Timing Root vegetables prefer cool weather. SpringSow as soon as soil can be worked and temperatures are mild Keep rows moist until seedlings establishFallStart 8-10 weeks before first expected frost Cool nights improve sweetness in many rootsFor season mapping, pair this with Spring Garden Planning: Getting Ready for the Growing Season and Fall Vegetable Gardening: What to Plant and When. The Most Ignored Step: Thinning I know thinning feels wasteful, but crowded seedlings produce tiny roots.Radishes: 1-2 inches apart Beets: 3-4 inches apart Turnips: 3-4 inches apart Carrots: 2-3 inches apartThin in stages if that feels easier on the heart. Watering for Better Roots Inconsistent moisture causes splitting, toughness, and uneven growth.Aim for steady moisture, not soggy soil Water deeply when top inch dries out Mulch lightly once seedlings are establishedUse How to Water a Vegetable Garden the Right Way if you want a full watering framework. Common Problems and Quick FixesProblem Likely Cause Quick FixForked carrots Compacted or rocky soil Loosen soil deeper and screen out stonesTiny roots Overcrowding Thin earlier and more aggressivelySplit roots Uneven watering Keep moisture consistentBitter flavor Heat stress or over-maturity Harvest younger and mulch betterPoor germination Dry seedbed Keep top layer evenly moist until sproutedHarvest WindowsRadishes: Often ready in 3-5 weeks Baby beets/turnips: About 5-7 weeks Full carrots: Depends on variety, often 10+ weeksDo not wait too long "for bigger roots." Many get woody if left too long in heat. My Root-Crop Habit I keep a little packet box by the back door and direct-sow a short row whenever I have 15 spare minutes. That tiny habit gives me far more roots than one big all-at-once planting. If your garden feels overwhelming, start with one row of radishes this week. Small starts still count. Related ReadingSpring Garden Planning: Getting Ready for the Growing Season Fall Vegetable Gardening: What to Plant and When How to Water a Vegetable Garden the Right Way
- 20 Mar, 2026
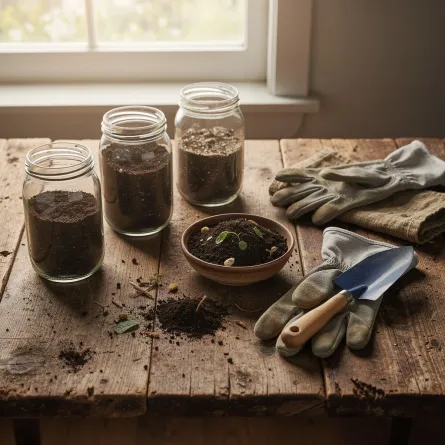
Spring Soil Testing and Amendments: Start Strong Without Guessing
I used to toss random bags of "garden booster" into my beds and hope for magic. Some years I got lucky. Some years I got giant leaves and almost no tomatoes. Soil testing fixed that guessing game. You do not need to become a chemist. You just need a baseline. Why Test Soil in Spring A spring test tells you what your soil actually needs before planting season gets busy.pH affects whether plants can use nutrients Nutrient levels show what is low or excessive Organic matter helps predict water-holding and structureWhen you know those three things, your fertilizer choices become much simpler. How to Take a Good Soil Sample Take your sample before heavy fertilizing.Use a clean trowel and bucket Pull small samples from 6-10 spots in one bed area Sample from root depth (about 6 inches for most vegetable beds) Mix thoroughly and remove stones/roots Let soil air-dry, then submit according to lab directionsTest separate areas separately if they are managed differently (for example, raised beds vs in-ground plots). Understanding the Results (Without Overthinking) pH Most vegetables prefer roughly 6.0-7.0.Low pH (too acidic): often corrected with agricultural lime High pH (too alkaline): usually improved gradually with organic matter and sulfur-based amendments where appropriateNitrogen, Phosphorus, PotassiumLow nitrogen: pale leaves and weak growth Low phosphorus: stunted growth and poor root development Low potassium: weak plants and poor stress toleranceFollow your lab's rates first. Avoid stacking extra products "just in case." Amendments That Actually Help Compost My favorite all-purpose amendment.Improves structure in clay and sandy soils Adds slow-release nutrients Supports soil lifeApply 1-2 inches as a top layer each spring, then lightly work in or leave as top-dressing. For basics, revisit Composting 101: Turn Kitchen Scraps into Garden Gold. Aged Manure Useful when fully composted and applied thoughtfully.Good fertility boost Best added well before planting heavy feedersLeaf Mold Excellent for moisture retention and soil texture.Especially helpful in sandy beds Gentle and low riskMineral Amendments Use only when your test indicates a need.Lime for low pH Gypsum for structure/specific calcium needs Rock phosphate or potash only if deficientEasy Spring Soil Routine Here is the routine I follow now:Test soil in late winter or early spring Add compost to all beds Correct pH only if needed Add targeted nutrients based on results Mulch after planting to protect soil gainsIt sounds like a lot, but once you do it once, it becomes a calm yearly rhythm. One Gentle Reminder Soil improvement is a long game. You are building a living system, not flipping a switch. If this is your first year testing, that is a big win already. If your energy is low, do one bed first and compare results. Seeing healthier growth in that one bed is usually all the motivation you need. Related ReadingComposting 101: Turn Kitchen Scraps into Garden Gold Spring Garden Planning: Getting Ready for the Growing Season Mulching for Healthier Garden Beds: A Practical Guide