Showing Posts From
Planning

- 25 Mar, 2026
Succession Planting for Continuous Harvests
I used to plant everything in one big enthusiastic weekend and then wonder why I had either too much lettuce or none at all. Succession planting fixed that feast-or-famine cycle in my garden. Think of it as planting in waves instead of one giant push. What Succession Planting Means Succession planting is simply sowing or transplanting crops at intervals so harvests are spread out. Instead of 30 radishes maturing the same week, you plant a short row every 10-14 days and harvest steadily. Why It Helps So MuchMore consistent harvests for the kitchen Less waste from overproduction Better use of garden space all season Easier workload for planting and preservingIf your energy is limited (mine certainly is some weeks), smaller repeat tasks are easier on your body than marathon garden days. Three Easy Succession Methods 1) Same Crop, Staggered Timing Plant the same crop every 1-3 weeks. Great for:Lettuce Radishes Bush beans Cilantro2) Different Crops in the Same Space As one crop finishes, another goes in. Example:Spring spinach Summer bush beans Fall turnips3) Early, Mid, and Late Varieties Plant varieties with different maturity windows at the same time. Example for carrots:Early variety Mid-season variety Storage varietySimple Timing Framework Use days to maturity and your frost dates.Check average first and last frost dates Count backward for fall crops Add a small time buffer in fall when day length shortens Set calendar reminders every 10-14 days for quick re-sowingThis works well alongside Spring Garden Planning: Getting Ready for the Growing Season and Fall Vegetable Gardening: What to Plant and When. Beginner Succession Calendar (Example)Every 10 days: lettuce, arugula, radishes Every 14 days: bush beans (through midsummer) Monthly: carrots and beets in small blocks Late summer: re-sow cool-season greens for fallAdjust to your climate, but the pattern stays the same. Common MistakesPlanting too much in each wave Forgetting to prep replacement seedlings in time Not refreshing soil between crops Ignoring heat stress during summer sowingsA quick compost top-dress between rotations helps beds bounce back. My Practical Rule I keep seed packets in a small basket by the door and sow one short row whenever I water deeply on Sundays. That tiny routine changed my harvests more than any expensive tool ever did. If you are feeling behind, start with one crop to succession-plant this month. One is enough to learn the rhythm. Related ReadingSpring Garden Planning: Getting Ready for the Growing Season Fall Vegetable Gardening: What to Plant and When Root Vegetables for Beginners: Carrots, Beets, Radishes, and Turnips
- 20 Mar, 2026
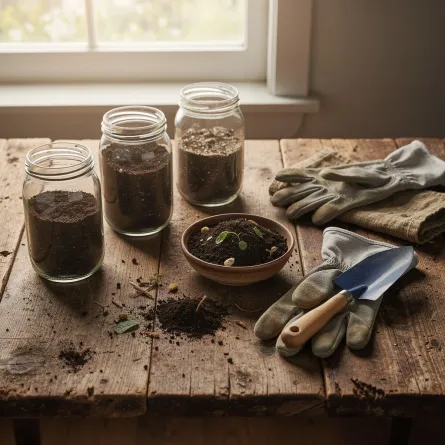
Spring Soil Testing and Amendments: Start Strong Without Guessing
I used to toss random bags of "garden booster" into my beds and hope for magic. Some years I got lucky. Some years I got giant leaves and almost no tomatoes. Soil testing fixed that guessing game. You do not need to become a chemist. You just need a baseline. Why Test Soil in Spring A spring test tells you what your soil actually needs before planting season gets busy.pH affects whether plants can use nutrients Nutrient levels show what is low or excessive Organic matter helps predict water-holding and structureWhen you know those three things, your fertilizer choices become much simpler. How to Take a Good Soil Sample Take your sample before heavy fertilizing.Use a clean trowel and bucket Pull small samples from 6-10 spots in one bed area Sample from root depth (about 6 inches for most vegetable beds) Mix thoroughly and remove stones/roots Let soil air-dry, then submit according to lab directionsTest separate areas separately if they are managed differently (for example, raised beds vs in-ground plots). Understanding the Results (Without Overthinking) pH Most vegetables prefer roughly 6.0-7.0.Low pH (too acidic): often corrected with agricultural lime High pH (too alkaline): usually improved gradually with organic matter and sulfur-based amendments where appropriateNitrogen, Phosphorus, PotassiumLow nitrogen: pale leaves and weak growth Low phosphorus: stunted growth and poor root development Low potassium: weak plants and poor stress toleranceFollow your lab's rates first. Avoid stacking extra products "just in case." Amendments That Actually Help Compost My favorite all-purpose amendment.Improves structure in clay and sandy soils Adds slow-release nutrients Supports soil lifeApply 1-2 inches as a top layer each spring, then lightly work in or leave as top-dressing. For basics, revisit Composting 101: Turn Kitchen Scraps into Garden Gold. Aged Manure Useful when fully composted and applied thoughtfully.Good fertility boost Best added well before planting heavy feedersLeaf Mold Excellent for moisture retention and soil texture.Especially helpful in sandy beds Gentle and low riskMineral Amendments Use only when your test indicates a need.Lime for low pH Gypsum for structure/specific calcium needs Rock phosphate or potash only if deficientEasy Spring Soil Routine Here is the routine I follow now:Test soil in late winter or early spring Add compost to all beds Correct pH only if needed Add targeted nutrients based on results Mulch after planting to protect soil gainsIt sounds like a lot, but once you do it once, it becomes a calm yearly rhythm. One Gentle Reminder Soil improvement is a long game. You are building a living system, not flipping a switch. If this is your first year testing, that is a big win already. If your energy is low, do one bed first and compare results. Seeing healthier growth in that one bed is usually all the motivation you need. Related ReadingComposting 101: Turn Kitchen Scraps into Garden Gold Spring Garden Planning: Getting Ready for the Growing Season Mulching for Healthier Garden Beds: A Practical Guide
- 16 Mar, 2026
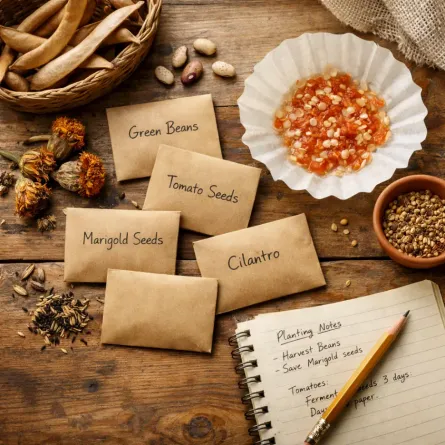
Seed Saving for Beginners: Keep the Best from This Year for Next Year
The first time I saved seeds, I felt a little ridiculous about how proud I was. It was just a labeled envelope of marigold seeds tucked in a kitchen drawer, and I looked at it like treasure. But that tiny envelope grew into one of my favorite garden habits. Seed saving is practical, yes. It can save money, preserve varieties you love, and help plants adapt over time to your garden. But it is also deeply satisfying. You close the loop from seed to plant and back to seed again. If you are new to this, start simple. You do not need to save seeds from everything your first year. Why Save Seeds? A few reasons I keep doing it:Lower costs over time Keeps favorite varieties in rotation Builds resilience with plants adapted to your conditions Feels meaningful to carry the season forwardOne note right away: seed saving is easiest and most reliable with open-pollinated and heirloom varieties. Know What Not to Save (Yet) You can save seeds from hybrid plants, but they often will not grow "true" next season. That means the new plants may be different in size, flavor, productivity, or color. For best beginner success:Choose open-pollinated varieties Label plants at planting time so you remember what they areEasiest Crops to Start With If you are anything like me, quick wins keep the motivation up. Beans and Peas These are wonderfully easy.Leave healthy pods on the plant until they dry fully. Harvest when pods are papery and brittle. Shell and remove damaged seeds. Let seeds air-dry another few days indoors.Store in a cool, dry place. Lettuce Let one or two plants bolt and flower. After flowering, fluffy seed heads form.Collect when heads look dry and feathery Rub gently between fingers to release seed Separate as much chaff as practicalNot glamorous, but very doable. Marigolds and Zinnias Perfect for beginners and very forgiving.Wait until blooms are fully dry on the plant Pull seed heads and break apart over a bowl Remove moisture-prone petals/debris before storageMy first saved marigolds came up like little old friends the next spring. Tomatoes: Slightly More Steps, Still Worth It Tomatoes need fermentation to remove the gel coating around the seed. Simple Tomato Seed ProcessScoop seeds and gel into a jar with a little water. Let sit 2-4 days at room temperature, stirring daily. Once a light mold forms, add water and pour off floating pulp. Rinse good seeds that sink. Spread seeds on a plate or coffee filter to dry completely (about 5-7 days).Label clearly with variety and year. If tomatoes are your main crop, pair this with your existing Growing Tomatoes Guide so you can track which varieties truly earn a repeat spot. Keep Seeds Dry, Dark, and Cool Storage matters as much as collection. My simple setup:Paper envelopes for each variety Envelopes inside a sealed glass jar Jar stored in a cool closet Silica packet or dry rice pouch nearby for humidity controlWhat I write on every envelope:Variety name Crop type Date saved Notes (flavor, vigor, disease issues)That little note line helps so much when planning spring sowing. Common Mistakes (I Have Made Most of These)Storing seeds before fully dry Forgetting labels (you will not "definitely remember") Saving from weak or diseased plants Mixing varieties accidentallyIf a batch fails, do not take it personally. Seed saving is a skill, and each season teaches you something. How Long Seeds Usually Last General home-storage ranges:Beans and peas: 3-5 years Tomatoes: 4-6 years Lettuce: 2-4 years Marigolds/zinnias: 2-5 yearsViability depends on storage conditions. If in doubt, do a quick germination test before planting season. Quick Germination TestPlace 10 seeds on a damp paper towel. Fold and place inside a loosely sealed bag. Keep warm and check after several days. Count how many sprout.If 8 out of 10 sprout, you are around 80% germination. Easy math, very helpful. A Gentle First-Year Seed-Saving Plan If you want a calm start, try this:Save one flower (marigold or zinnia) Save one easy vegetable (bean or pea) Save one "stretch" crop (tomato)That is enough to build confidence and keep it enjoyable. Last fall, I sat at my kitchen table with a cup of tea and a stack of little seed envelopes, labeling them while rain tapped at the windows. It felt old-fashioned in the best way, like I was writing a note to next spring. Start with one packet this year. One is plenty. By next season, when those saved seeds wake up in your soil, you will understand exactly why gardeners get attached to this process. Related ReadingSpring Garden Planning: Getting Ready for the Growing Season Succession Planting for Continuous Harvests Creating a Pollinator Paradise: Attracting Bees and Butterflies to Your Garden
- 05 Mar, 2026
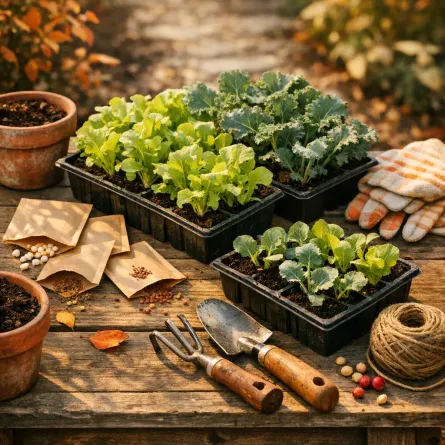
Fall Vegetable Gardening: What to Plant and When
Many gardeners treat summer like the finish line, but some of my favorite harvests come in fall. Cooler temperatures ease the pest pressure, and plenty of crops taste sweeter after chilly nights. With smart timing, you can keep harvesting well into autumn and, in some climates, even through winter. Why Fall Gardening Works So Well Cool-season crops thrive when days are mild and nights are cool. In many regions, fall weather is more stable than spring, which means fewer temperature swings and less stress on young plants. Other advantages:Fewer weeds than spring planting Slower bolting in leafy greens Better flavor in carrots, kale, and brassicas after light frost Productive use of beds after summer crops finishStart With Your First Fall Frost Date Your first expected fall frost date is the anchor for all planning.Look up your average first frost date Count backward based on each crop's days to maturity Add 1-2 extra weeks because shorter days slow growthThis gives you a practical sowing window instead of guesswork. Reliable Fall Crops Fast Growers (Great for late starts)Radishes Arugula Baby spinach Mustard greens Turnips (for greens and roots)Mid-Season CropsBeets Carrots Swiss chard Lettuce mixes Bush peas in mild climatesFrost-Tolerant StandoutsKale Collards Cabbage Broccoli (transplants) Brussels sprouts (transplants)Use transplants for longer-season brassicas if your fall window is short. A Simple Fall Planting Timeline Use this as a framework and adjust to your climate.12-14 weeks before first frost: start broccoli, cabbage, and kale transplants 10-12 weeks before first frost: sow carrots, beets, and chard 8-10 weeks before first frost: sow lettuce, spinach, and turnips 6-8 weeks before first frost: sow radishes and arugulaSuccession planting every 10-14 days keeps harvests coming. Preparing Beds After Summer Crops When tomatoes, cucumbers, or beans decline, reset beds quickly:Remove spent plants and diseased debris Add compost to replace nutrients Loosen topsoil and level the bed Irrigate before sowing for even germination Mulch after seedlings are establishedThis fast turnover keeps late-season momentum. Managing Heat During Fall Starts In many places, fall planting begins while days are still hot.Water seed rows consistently to prevent crusting Use shade cloth during intense afternoon sun Sow in the evening and keep surface moisture steady Choose heat-tolerant lettuce varieties for early roundsOnce temperatures drop, growth becomes easier to manage. Light Frost Protection That Extends Harvest Simple protection can add weeks or months of production.Floating row cover: protects from light frost and wind Low tunnels: create a warmer microclimate Cold frames: ideal for greens in late fall and winter Mulch around roots: buffers soil temperatureInstall supports before bad weather arrives so protection is quick when forecasts change. Common Fall Gardening Mistakes Planting Too Late The biggest issue is missing the maturity window. Count backward early and plant on time. Forgetting Day-Length Slowdown Crops that mature in 45 days in spring may need longer in fall. Add buffer time. Not Rebuilding Soil Between Seasons Beds exhausted from summer need compost and moisture before replanting. Growing Only One Round Succession sowings create steady harvests instead of one short flush. Final Takeaway Fall gardening rewards planning more than luck. Start with frost dates, choose dependable cool-season crops, and protect plants when temperatures dip. With a little structure, your garden can stay productive long after summer beds fade. If spring is about beginnings, fall is about finishing strong. Start with one sowing this week and build from there. Related ReadingSpring Garden Planning: Getting Ready for the Growing Season Mulching for Healthier Garden Beds: A Practical Guide Root Vegetables for Beginners: Carrots, Beets, Radishes, and Turnips
- 02 Jan, 2026
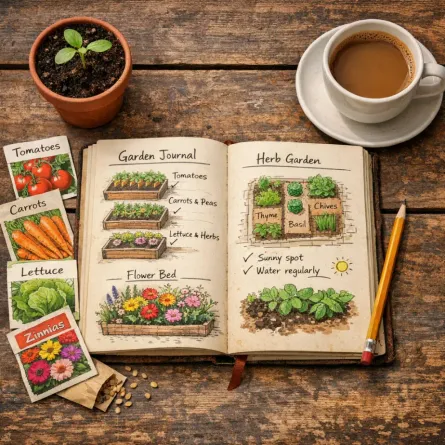
Spring Garden Planning: Getting Ready for the Growing Season
While winter winds are still blowing, spring planning has already started at my kitchen table. There is something so hopeful about flipping through seed catalogs and sketching bed plans while the world outside still looks gray. January-February: Dream and Plan Review Last Year Before planning ahead, look back:What grew well? What struggled? Which varieties were worth growing again? Were there pest or disease problems? Did you have too much or too little of anything?I keep a garden journal for exactly this purpose. Even just a few notes about what worked and what didn't is invaluable. Order Seeds Early The best varieties sell out fast! Here's my approach:Make a list of must-haves first Try 2-3 new varieties each year Consider disease-resistant varieties if you had problems Check seed viability if using saved seedsSeed catalog favorites:Johnny's Selected Seeds (great for northern climates) Baker Creek (heirloom varieties) High Mowing (organic seeds) Local seed companies for regionally-adapted varietiesPlan Your Layout Sketch your garden beds and plan what goes where. Consider:Crop rotation: Don't plant the same family in the same spot as last year Sun exposure: Tall plants shouldn't shade shorter ones Succession planting: Plan multiple sowings of quick crops Companion planting: Group friends together (here is a practical Companion Planting Guide)March-April: Start Seeds and Prep Indoor Seed Starting Count back from your last frost date to know when to start:10-12 weeks before: Onions, leeks, peppers 6-8 weeks before: Tomatoes, eggplant 4-6 weeks before: Brassicas, herbs 2-4 weeks before: Squash, cucumbers (if transplanting)Seed starting essentials:Sterile seed-starting mix Good drainage Bottom heat (heat mat) Strong light source Consistent moistureGarden Bed Preparation As soon as the ground can be worked:Remove debris and any lingering weeds Test your soil every 2-3 years Add compost: 2-4 inches worked into top layer Address drainage issues before planting Edge beds for a clean look and to prevent grass invasionClean and RepairSharpen tools and oil wooden handles Clean and sanitize pots and trays Repair raised beds, trellises, and fencing Check irrigation systemsApril-May: Hardening Off and Planting Hardening Off Seedlings Don't skip this step! Gradually introduce indoor seedlings to outdoor conditions: Week 1: 1-2 hours of shade, bring in at nightWeek 2: 3-4 hours with some morning sunWeek 3: Full day outside, bring in if frost threatensWeek 4: Leave out overnight if no frost expected Planting Timeline Before last frost:Direct sow peas, lettuce, spinach, radishes Transplant brassicas (with protection) Plant onion sets and seed potatoesAfter last frost:Transplant tomatoes, peppers, eggplant Direct sow beans, squash, cucumbers Plant tender herbsTwo weeks after last frost:It's finally safe for everything!My Spring Planning Ritual Every January, I make a cup of tea, gather my seed catalogs and old garden notes, and spend a quiet afternoon dreaming about the year ahead. I sketch my beds, make my seed list, and place my orders. There is something magical about those paper packets of potential, each one holding the promise of future meals and flower stems on the table. Even on the coldest day, planning spring reminds me that warmth and growth are coming. Free Garden Planning Worksheet Here's a simple planning template: For each bed, note:Last year's crops This year's planned crops Planting dates Seed/transplant source Expected harvest windowMonthly to-do checklist: January: Order seeds, review journal February: Start slow-growing seeds indoors March: Start main crop seeds, prep beds April: Harden off, plant cool-season crops May: Plant warm-season cropsIf you also map out your cool-season crops now, you'll set yourself up for a stronger Fall Vegetable Gardening season. Related ReadingSpring Soil Testing and Amendments: Start Strong Without Guessing Root Vegetables for Beginners: Carrots, Beets, Radishes, and Turnips