- 18 Mar, 2026
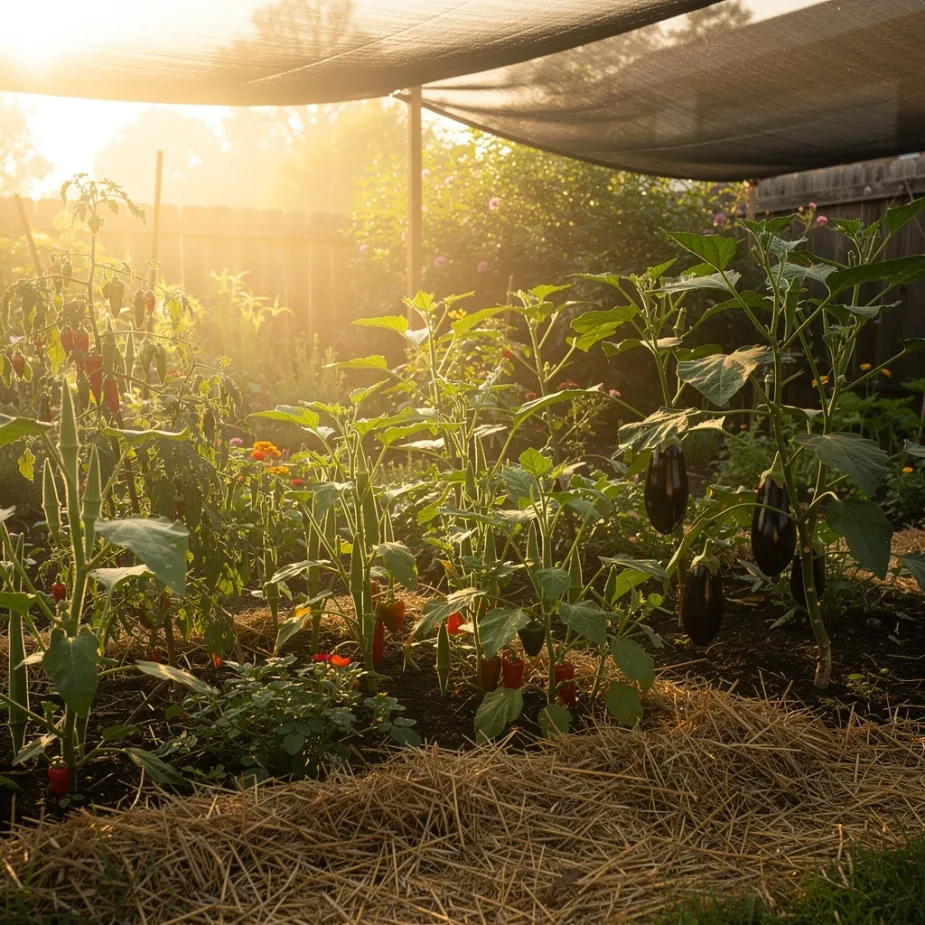
Summer Heat Heroes: Vegetables That Thrive in Hot Weather
If your garden turns into a crispy little panic zone in July, you are not doing anything wrong. Some summers feel like standing in front of an open oven. I used to think the whole season was doomed once daytime temps sat above 90F, but a few smart crop choices changed everything. The trick is simple: grow vegetables that like heat and protect the rest with good routines. Heat-Tolerant Crops That Keep Going These are my reliable summer workhorses:Okra: Loves heat and keeps producing when many plants sulk Southern peas (cowpeas/black-eyed peas): Tough, productive, and forgiving Sweet potatoes: Vigorous growth once the soil warms up Malabar spinach: Not true spinach, but wonderful in heat Yardlong beans: Productive climber in hot weather Eggplant: Thrives when nights stay warm Peppers: Better performance with steady moisture and mulchIf you have room, plant at least two of these every year. That way, even in rough weather, you still bring in harvests. Watering in Heat Without Wasting Water Hot-weather watering is about consistency, not panic.Water deeply 2-3 times per week instead of shallow daily sprinkles Water early in the morning so roots are charged before afternoon heat Target soil, not leaves, to reduce disease pressure Check moisture 2 inches down before watering againIf you want a full foundation, pair this with How to Water a Vegetable Garden the Right Way. Mulch Is Not Optional in a Heat Wave Mulch acts like shade for your soil.Add 2-3 inches of straw, shredded leaves, or untreated grass clippings Keep mulch a little away from stems to prevent rot Replenish midsummer as it breaks downGood mulch can lower soil temperature, hold moisture, and reduce plant stress in one shot. I lean on this heavily in July. For a deeper how-to, see Mulching for Healthier Garden Beds: A Practical Guide. Simple Shade Tricks That Work Even heat-loving plants appreciate protection during extreme spells.Use 30% shade cloth over hoops during peak afternoon sun Give newly transplanted seedlings temporary shade for 3-5 days Plant taller crops on the west side to cast light afternoon shadeYou do not need a fancy setup. I have used clipped bedsheets in a pinch and saved young basil that would have fried otherwise. Signs of Heat Stress to Catch Early Watch for these before plants crash:Leaf curl during the hottest part of the day that does not recover by evening Blossom drop on tomatoes and peppers Bitter greens and bolting herbs Dull, gray-green foliage and slowed growthWhen you see this, shift to a recovery routine: deep morning water, fresh mulch, and temporary shade. A Practical Mid-Summer Reset Plan When your beds look tired, do this over one weekend:Remove dead or diseased foliage Top-dress with compost Refresh mulch Reseed quick crops in any open spaces (bush beans, basil, cucumbers) Install shade support before the next heat spikeThis reset pairs well with Late-Summer Garden Reset: What I Do When the Beds Look Tired. My Heat-Season Rule I no longer chase perfection in high summer. I chase resilience. A garden that survives a rough heat stretch and still gives you peppers, beans, and herbs is a successful garden. If your beds are struggling right now, start with one thing: mulch first. Then adjust watering. Those two changes alone can turn the season around. Related ReadingHow to Water a Vegetable Garden the Right Way Mulching for Healthier Garden Beds: A Practical Guide Late-Summer Garden Reset: What I Do When the Beds Look Tired
- 16 Mar, 2026
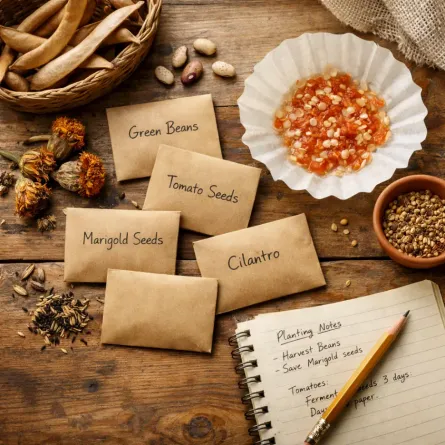
Seed Saving for Beginners: Keep the Best from This Year for Next Year
The first time I saved seeds, I felt a little ridiculous about how proud I was. It was just a labeled envelope of marigold seeds tucked in a kitchen drawer, and I looked at it like treasure. But that tiny envelope grew into one of my favorite garden habits. Seed saving is practical, yes. It can save money, preserve varieties you love, and help plants adapt over time to your garden. But it is also deeply satisfying. You close the loop from seed to plant and back to seed again. If you are new to this, start simple. You do not need to save seeds from everything your first year. Why Save Seeds? A few reasons I keep doing it:Lower costs over time Keeps favorite varieties in rotation Builds resilience with plants adapted to your conditions Feels meaningful to carry the season forwardOne note right away: seed saving is easiest and most reliable with open-pollinated and heirloom varieties. Know What Not to Save (Yet) You can save seeds from hybrid plants, but they often will not grow "true" next season. That means the new plants may be different in size, flavor, productivity, or color. For best beginner success:Choose open-pollinated varieties Label plants at planting time so you remember what they areEasiest Crops to Start With If you are anything like me, quick wins keep the motivation up. Beans and Peas These are wonderfully easy.Leave healthy pods on the plant until they dry fully. Harvest when pods are papery and brittle. Shell and remove damaged seeds. Let seeds air-dry another few days indoors.Store in a cool, dry place. Lettuce Let one or two plants bolt and flower. After flowering, fluffy seed heads form.Collect when heads look dry and feathery Rub gently between fingers to release seed Separate as much chaff as practicalNot glamorous, but very doable. Marigolds and Zinnias Perfect for beginners and very forgiving.Wait until blooms are fully dry on the plant Pull seed heads and break apart over a bowl Remove moisture-prone petals/debris before storageMy first saved marigolds came up like little old friends the next spring. Tomatoes: Slightly More Steps, Still Worth It Tomatoes need fermentation to remove the gel coating around the seed. Simple Tomato Seed ProcessScoop seeds and gel into a jar with a little water. Let sit 2-4 days at room temperature, stirring daily. Once a light mold forms, add water and pour off floating pulp. Rinse good seeds that sink. Spread seeds on a plate or coffee filter to dry completely (about 5-7 days).Label clearly with variety and year. If tomatoes are your main crop, pair this with your existing Growing Tomatoes Guide so you can track which varieties truly earn a repeat spot. Keep Seeds Dry, Dark, and Cool Storage matters as much as collection. My simple setup:Paper envelopes for each variety Envelopes inside a sealed glass jar Jar stored in a cool closet Silica packet or dry rice pouch nearby for humidity controlWhat I write on every envelope:Variety name Crop type Date saved Notes (flavor, vigor, disease issues)That little note line helps so much when planning spring sowing. Common Mistakes (I Have Made Most of These)Storing seeds before fully dry Forgetting labels (you will not "definitely remember") Saving from weak or diseased plants Mixing varieties accidentallyIf a batch fails, do not take it personally. Seed saving is a skill, and each season teaches you something. How Long Seeds Usually Last General home-storage ranges:Beans and peas: 3-5 years Tomatoes: 4-6 years Lettuce: 2-4 years Marigolds/zinnias: 2-5 yearsViability depends on storage conditions. If in doubt, do a quick germination test before planting season. Quick Germination TestPlace 10 seeds on a damp paper towel. Fold and place inside a loosely sealed bag. Keep warm and check after several days. Count how many sprout.If 8 out of 10 sprout, you are around 80% germination. Easy math, very helpful. A Gentle First-Year Seed-Saving Plan If you want a calm start, try this:Save one flower (marigold or zinnia) Save one easy vegetable (bean or pea) Save one "stretch" crop (tomato)That is enough to build confidence and keep it enjoyable. Last fall, I sat at my kitchen table with a cup of tea and a stack of little seed envelopes, labeling them while rain tapped at the windows. It felt old-fashioned in the best way, like I was writing a note to next spring. Start with one packet this year. One is plenty. By next season, when those saved seeds wake up in your soil, you will understand exactly why gardeners get attached to this process. Related ReadingSpring Garden Planning: Getting Ready for the Growing Season Succession Planting for Continuous Harvests Creating a Pollinator Paradise: Attracting Bees and Butterflies to Your Garden
- 14 Mar, 2026
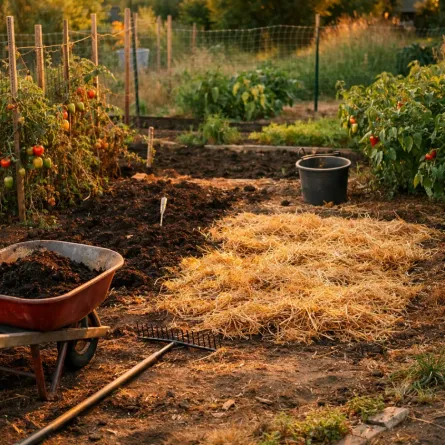
Late-Summer Garden Reset: What I Do When the Beds Look Tired
By late summer, my garden always looks a little... honest. Tomatoes are sprawling, cucumbers are dramatic, some beds are glorious, and some look like they gave up two weeks ago. For years, I used to feel behind at this point in the season. Now I treat late summer as a reset window, not a failure report card. A good reset helps the garden finish strong and makes fall planting much easier. Step 1: Do a Gentle Garden Walk-Through Before pulling anything, I walk the whole garden with a notebook. I check three things in each bed:What is still producing well? What is declining or disease-prone? What space can be reopened for fall crops?This takes 15 minutes and saves me hours of random, unfocused effort. Step 2: Remove What Is Truly Done I used to leave tired plants too long out of guilt. Now I am more practical. Pull or cut back:Spent annuals that are no longer blooming Vegetable plants with clear disease decline Crops that bolted and turned bitter Broken supports and tangled twineHealthy, non-diseased material can go to compost. If disease is present, remove from the garden and discard according to local guidance. If compost is part of your rhythm, this Composting 101 post is handy for deciding what can safely go in. Step 3: Tidy and Re-Support the Keepers Some plants still have plenty left to give in late summer. I usually keep and tidy:Productive tomatoes and peppers Ongoing herbs (basil, parsley, oregano) Flowering pollinator plants still feeding beesQuick actions that make a big difference:Re-tie tomatoes to stakes or strings Remove yellowing lower leaves for better airflow Harvest regularly to encourage continued production Thin crowded growth where humidity is trapping moistureStep 4: Refresh Soil in Open Spaces When a bed section clears, I top it up right away. My basic reset mix:1-2 inches compost Light rake-in at the surface Water deeply to settleIf a bed has had heavy feeders all season (like tomatoes), I may add a balanced organic fertilizer before fall planting. Step 5: Re-Mulch Like You Mean It By now, mulch has usually thinned out or broken down. A fresh layer helps with:Moisture retention during hot spells Fewer weeds in transition weeks More even soil temperaturesI aim for about 2 inches around established plants, keeping mulch a bit back from stems. If mulching has felt confusing, this Mulching Guide explains what to use and where. Step 6: Reset Watering for Reality Late summer watering needs shift quickly as nights cool and days shorten. I adjust by:Checking soil moisture before watering Watering deeply but less often where possible Prioritizing new transplants and containersAnd I remind myself: wilting at noon does not always mean drought. Check soil first before adding more water. Step 7: Plant the Next Wave This is where the reset pays off. Cleared pockets become prime spots for cool-season crops. Depending on your climate, consider:Lettuce, arugula, spinach Radishes and turnips Kale and chard Cilantro, dill, parsleyFor full timing, your Fall Vegetable Gardening Guide has the step-by-step planning approach. Step 8: Take Notes for Next Year I keep this very simple. At the end of a reset day, I write:one thing that worked one thing that struggled one change to make next seasonThat tiny habit has improved my garden more than any fancy tool. My Two-Hour Late-Summer Reset Plan When I am short on energy, this is my realistic version:20 minutes: walk-through and notes 35 minutes: remove spent plants from one or two beds 25 minutes: compost + rake + water in open spaces 20 minutes: re-tie and tidy productive plants 20 minutes: sow quick fall crops or transplant startsThen I stop. Even if more could be done. A couple summers ago I sat on the back step after one of these reset sessions, sweaty and dusty and not exactly glamorous, and realized the garden looked calm again. Not perfect. Just cared for. If your beds look tired right now, you have not missed your chance. Start with one bed this week, reset it gently, and let that small momentum carry you into fall. Related ReadingSummer Heat Heroes: Vegetables That Thrive in Hot Weather Common Garden Diseases: Identify, Prevent, and Treat Naturally Fall Vegetable Gardening: What to Plant and When
- 10 Mar, 2026
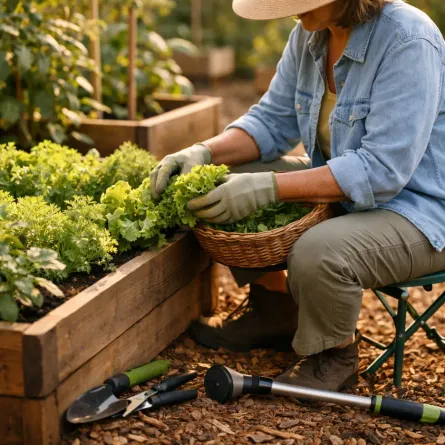
Gentle Gardening: How I Keep Growing with Achy Knees and a Complaining Back
I used to think "real" gardening meant kneeling for hours, hauling heavy bags, and powering through no matter how stiff I felt. These days, my knees have opinions and my lower back has a full-time complaint department. And honestly? I still garden just as much. I just garden smarter. If your body is changing, if your energy dips by mid-afternoon, if you love your garden but dread how you will feel afterward, you are not doing anything wrong. You just need a different rhythm. Let Go of the All-or-Nothing Mindset The biggest shift for me was this: a 20-minute garden session counts. Not every day needs to be a "big garden day." In fact, I now plan for short sessions on purpose.15-20 minutes: weeding one bed 20 minutes: deadheading and quick watering check 30 minutes: harvesting and tidying pathsThree short sessions in a week often do more than one exhausting marathon that leaves you sore for two days. Build Comfort into the Garden Itself Raised Beds Save More Than Time If your back complains when you bend, raised beds are worth every bit of effort and cost. What has helped me most:Beds 12-18 inches high for easier reaching Paths wide enough for a stool or garden cart Keeping bed width to about 3-4 feet so I can reach the center without stretchingIf you are thinking about setup, this guide on Raised Bed Gardening is a great companion. Add Places to Sit I have a small folding stool that follows me around like a loyal dog. Best purchase I made in years.Use a garden kneeler/bench combo Keep one stool in each main garden zone Sit for sowing, thinning, and harvesting low cropsSit-down gardening is still gardening. Period. Soften the Ground You Walk On Hard, uneven paths make fatigue worse. I noticed this right away.Add wood chips or fine gravel on paths Remove tripping hazards and edging that catches your foot Use stepping stones in muddy spotsSmall path upgrades can make long-term gardening feel safer and less tiring. Use Tools That Work with You For years I used whatever cheap tools were around. My hands and shoulders paid for it. Now I choose tools with comfort first:Long-handled weeders to reduce bending Ergonomic grips for less wrist strain Lightweight hoses or watering wands A wheeled cart instead of carrying loadsIf a tool makes you wince, replace it when you can. You are not being fussy. You are protecting your body so you can keep gardening for years. Pace Your Work Like You Mean It I break tasks into categories: bend-heavy, lift-heavy, and easy-standing jobs. Then I alternate. Example of a kinder flow:10 minutes of weeding (bend-heavy) 10 minutes of pruning or tying plants (standing) 10 minutes of harvesting (mixed) Quick clean-up and doneI also use what I call the "tea timer rule": when the timer goes off, I stand up, stretch, and check in with my back before deciding to continue. Choose High-Reward, Low-Strain Crops Some crops are generous without demanding acrobatics. My personal favorites:Bush beans: productive and easy to pick Lettuce mixes: quick harvests, little fuss Herbs near the door: easy snip-and-go Zinnias: cheerful, resilient, and excellent for cuttingI still grow a few ambitious things, but I balance them with plants that make me feel successful. Watering Without Wearing Yourself Out Dragging a heavy hose across the yard used to finish me off. Now I rely on systems and routines:Soaker hoses or drip lines in main beds Watering wand with shutoff valve for containers Morning checks to avoid emergency evening wateringIf watering feels like a daily battle, this post on How to Water a Vegetable Garden the Right Way is very useful, and the same principles apply beautifully to beds and pots. Recovery Is Part of Gardening I did not use to count recovery as garden work. I do now. After every session:2-3 minutes gentle stretching Water for me, not just the plants A quick note in my journal about what to do nextThat last one helps me start easier tomorrow. No spinning wheels, no standing there wondering where to begin. A Gentle Weekly Plan That Actually Works Here is the rhythm I use in spring and summer:Monday: 20 minutes weeding one bed Wednesday: 20-30 minutes planting or pruning Friday: harvest + deadheading + path tidy Weekend (optional): one bigger project only if my body feels up for itNotice there is built-in grace. Missing one day does not ruin the week. My Quiet Rule for Hard Days Some mornings my back is loud before I even make coffee. On those days, I pick one tiny task:pinch basil tips pull five weeds refill the birdbathThat is enough. Truly. A few summers ago, I sat on my little bench after ten slow minutes of deadheading and watched bees move through the salvia. I had done almost nothing by old standards, but I felt calm and proud and very much alive. That is the kind of gardening I want now. Start where your body is today, not where it was twenty years ago. One raised bed, one stool, one short session at a time is still a beautiful garden life.
- 09 Mar, 2026
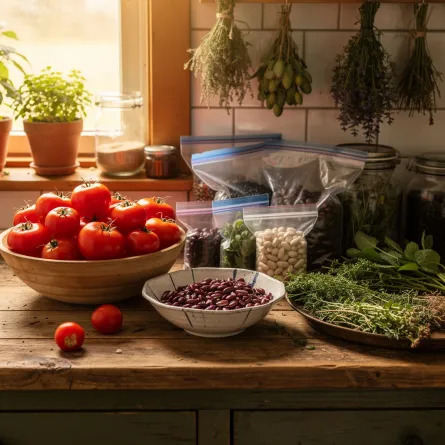
From Garden to Pantry: Easy Preserving for Beginners
There is a very specific kind of summer panic when zucchini, beans, and tomatoes all come in at once. I have stood in my kitchen looking at bowls of produce like, "Well, this escalated quickly." Preserving is how I keep that abundance from turning into guilt. Start with the Easiest Method First You do not need to do everything in year one. Pick one method and get comfortable.Freezing: easiest entry point Drying: great for herbs, some fruits, and peppers Canning: useful and satisfying, but follow safe tested methods closelyFreezing Basics Freezing is my weeknight lifesaver. Best forGreen beans (blanched) Peas (blanched) Corn kernels (blanched) Chopped peppers (raw) Tomato sauce (cooked) Herbs in oil or water cubesBasic ProcessWash and prep produce Blanch vegetables when needed Cool quickly in ice water Drain thoroughly Pack in freezer-safe bags or containers Label with date and contentsI write dates in big marker because future me does not enjoy guessing games. Drying Basics Drying is wonderful when freezer space is tight. Best forHerbs (basil, oregano, thyme, mint) Hot peppers Apple slices Cherry tomatoes (with proper dehydrator settings)TipsKeep pieces uniform for even drying Use low heat and good airflow Store fully dried foods in airtight jars away from lightIf moisture remains, food can mold. When in doubt, dry a little longer. Canning: Keep It Safe and Simple Canning is deeply rewarding, but safety matters.Use tested recipes from trusted sources Water-bath can high-acid foods (like many jams, pickles, some tomato recipes) Pressure can low-acid foods (most vegetables, meats, broths) Never wing acidity levelsIf you are brand new, begin with a simple jam or pickle recipe from a tested source and learn the workflow. What to Preserve First (Beginner Priority List) When harvest is heavy and energy is low, this is my order:Freeze what spoils fastest Dry herbs before they flower or yellow Turn soft tomatoes into quick sauce for freezing Save canning projects for a calmer dayThis keeps food from being lost while still protecting your back and your sanity. Pair Preserving with Garden Planning If you plan to preserve, plant for it on purpose.Grow paste tomatoes for sauce Plant extra basil for drying/pesto cubes Choose bean varieties that freeze well Stagger plantings to avoid one giant harvest spikeThat rhythm works beautifully with Succession Planting for Continuous Harvests. My Quiet Favorite Winter Moment On a gray January day, opening a jar or freezer container from your own garden feels like a small love note from summer. It really does. If you feel overwhelmed by preserving, pick one tray of produce this week and freeze it. Small batches count. Related ReadingLate-Summer Garden Reset: What I Do When the Beds Look Tired Growing Tomatoes: From Seed to Sauce Succession Planting for Continuous Harvests