Showing Posts From
Garden maintenance
- 14 Mar, 2026
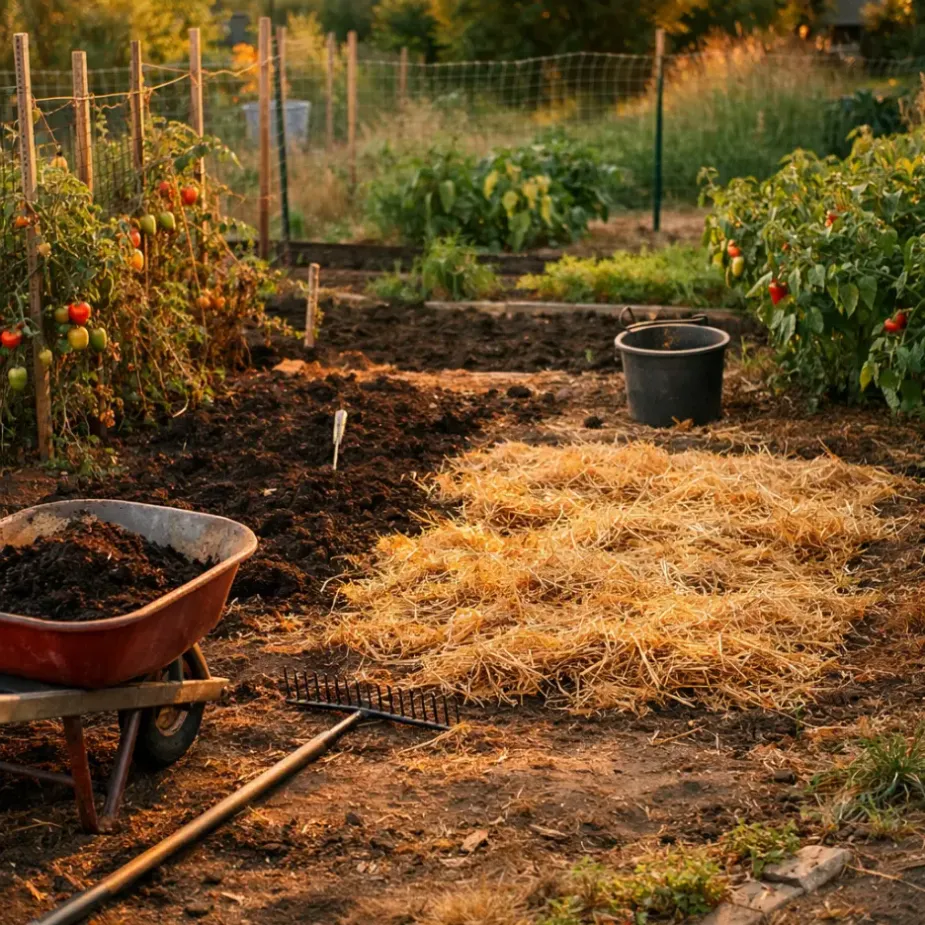
Late-Summer Garden Reset: What I Do When the Beds Look Tired
By late summer, my garden always looks a little... honest. Tomatoes are sprawling, cucumbers are dramatic, some beds are glorious, and some look like they gave up two weeks ago. For years, I used to feel behind at this point in the season. Now I treat late summer as a reset window, not a failure report card. A good reset helps the garden finish strong and makes fall planting much easier. Step 1: Do a Gentle Garden Walk-Through Before pulling anything, I walk the whole garden with a notebook. I check three things in each bed:What is still producing well? What is declining or disease-prone? What space can be reopened for fall crops?This takes 15 minutes and saves me hours of random, unfocused effort. Step 2: Remove What Is Truly Done I used to leave tired plants too long out of guilt. Now I am more practical. Pull or cut back:Spent annuals that are no longer blooming Vegetable plants with clear disease decline Crops that bolted and turned bitter Broken supports and tangled twineHealthy, non-diseased material can go to compost. If disease is present, remove from the garden and discard according to local guidance. If compost is part of your rhythm, this Composting 101 post is handy for deciding what can safely go in. Step 3: Tidy and Re-Support the Keepers Some plants still have plenty left to give in late summer. I usually keep and tidy:Productive tomatoes and peppers Ongoing herbs (basil, parsley, oregano) Flowering pollinator plants still feeding beesQuick actions that make a big difference:Re-tie tomatoes to stakes or strings Remove yellowing lower leaves for better airflow Harvest regularly to encourage continued production Thin crowded growth where humidity is trapping moistureStep 4: Refresh Soil in Open Spaces When a bed section clears, I top it up right away. My basic reset mix:1-2 inches compost Light rake-in at the surface Water deeply to settleIf a bed has had heavy feeders all season (like tomatoes), I may add a balanced organic fertilizer before fall planting. Step 5: Re-Mulch Like You Mean It By now, mulch has usually thinned out or broken down. A fresh layer helps with:Moisture retention during hot spells Fewer weeds in transition weeks More even soil temperaturesI aim for about 2 inches around established plants, keeping mulch a bit back from stems. If mulching has felt confusing, this Mulching Guide explains what to use and where. Step 6: Reset Watering for Reality Late summer watering needs shift quickly as nights cool and days shorten. I adjust by:Checking soil moisture before watering Watering deeply but less often where possible Prioritizing new transplants and containersAnd I remind myself: wilting at noon does not always mean drought. Check soil first before adding more water. Step 7: Plant the Next Wave This is where the reset pays off. Cleared pockets become prime spots for cool-season crops. Depending on your climate, consider:Lettuce, arugula, spinach Radishes and turnips Kale and chard Cilantro, dill, parsleyFor full timing, your Fall Vegetable Gardening Guide has the step-by-step planning approach. Step 8: Take Notes for Next Year I keep this very simple. At the end of a reset day, I write:one thing that worked one thing that struggled one change to make next seasonThat tiny habit has improved my garden more than any fancy tool. My Two-Hour Late-Summer Reset Plan When I am short on energy, this is my realistic version:20 minutes: walk-through and notes 35 minutes: remove spent plants from one or two beds 25 minutes: compost + rake + water in open spaces 20 minutes: re-tie and tidy productive plants 20 minutes: sow quick fall crops or transplant startsThen I stop. Even if more could be done. A couple summers ago I sat on the back step after one of these reset sessions, sweaty and dusty and not exactly glamorous, and realized the garden looked calm again. Not perfect. Just cared for. If your beds look tired right now, you have not missed your chance. Start with one bed this week, reset it gently, and let that small momentum carry you into fall. Related ReadingSummer Heat Heroes: Vegetables That Thrive in Hot Weather Common Garden Diseases: Identify, Prevent, and Treat Naturally Fall Vegetable Gardening: What to Plant and When

- 20 Feb, 2026
Mulching for Healthier Garden Beds: A Practical Guide
If compost is garden gold, mulch is the cozy blanket that keeps your soil steady and productive. A well-mulched bed needs less watering, grows fewer weeds, and handles weather swings much better. The best part is that mulching is simple once you know a few practical rules. Why Mulch Matters Mulch is any material placed on top of the soil surface. Its job is to protect and improve the growing environment. Benefits include:Suppresses weed germination Reduces evaporation and watering frequency Moderates soil temperature Prevents soil crusting and compaction from heavy rain Protects soil life and organic matterOrganic mulches break down over time, feeding the soil food web and gradually improving structure. Organic vs Inorganic Mulch Organic Mulch Examples: straw, shredded leaves, compost, pine needles, grass clippings, wood chips.Improves soil as it decomposes Usually better for edible and ornamental beds Needs replenishing each seasonInorganic Mulch Examples: gravel, rubber chips, landscape fabric with rock.Longer lasting Useful in pathways or dry landscape areas Does not build soil biologyFor most home food gardens, organic mulch is the better long-term choice. Best Mulch Types by Garden Area Vegetable BedsStraw (seed-free): excellent all-purpose choice Shredded leaves: free and effective if partially decomposed Compost: great top-dressing, best paired with another mulch layerAvoid thick fresh wood chips directly in annual vegetable beds during active growing, especially around tiny seedlings. Perennial Beds and Shrub BordersWood chips: durable, slow breakdown, strong weed suppression Leaf mold: excellent moisture retention and soil conditioningPathsCoarse wood chips or bark Gravel (if you want a permanent surface)When to Apply Mulch Timing matters.In spring: wait until soil has warmed before adding thick layers around warm-season crops In summer: apply to conserve moisture and reduce stress In fall: top up beds to protect soil through winter rain and windAlways weed and water first, then mulch. How Much Mulch to Use For most beds, 2-3 inches is ideal.Less than 2 inches usually lets weeds through More than 4 inches can reduce airflow and trap too much moistureKeep mulch a few inches away from stems and trunks. Piling mulch against stems can lead to rot and pest issues. Step-by-Step Mulching ProcessRemove existing weeds, including roots where possible Water the bed deeply Add a light compost layer if needed Spread mulch evenly to 2-3 inches Pull mulch back from stems and crowns Check and refresh thin spots during the seasonThis one-time setup can save hours of weeding and frequent watering later. Common Mulching Mistakes Mulching Over Weeds Mulch suppresses new weeds but often fails against established perennial weeds. Clear the bed first. Using Hay Instead of Straw Hay often contains seeds and can create a weed problem. Choose clean straw when possible. Applying Fresh Grass Clippings Too Thick Wet grass layers can mat down and smell sour. Use thin layers or dry them before applying. Creating Mulch Volcanoes Around Plants Keep mulch off plant stems and tree trunks to prevent rot. Seasonal Maintenance PlanEarly spring: loosen compacted mulch and top up thin areas Mid-summer: check depth and add a thin refresh layer if needed Fall: add leaves or chips to protect bare soil over winterMulch is not a one-time task. Small adjustments through the season keep beds working efficiently. Final Takeaway Mulch is one of the highest-return jobs in the garden. A few hours spreading mulch can save you weeks of weeding and extra watering while steadily improving soil health. If your goal is less work and better results, start with mulch. If your back complains like mine does, do it in short rounds and call that a win. Related ReadingComposting 101: Turn Kitchen Scraps into Garden Gold How to Water a Vegetable Garden the Right Way Summer Heat Heroes: Vegetables That Thrive in Hot Weather