Showing Posts From
Raised beds
- 10 Mar, 2026
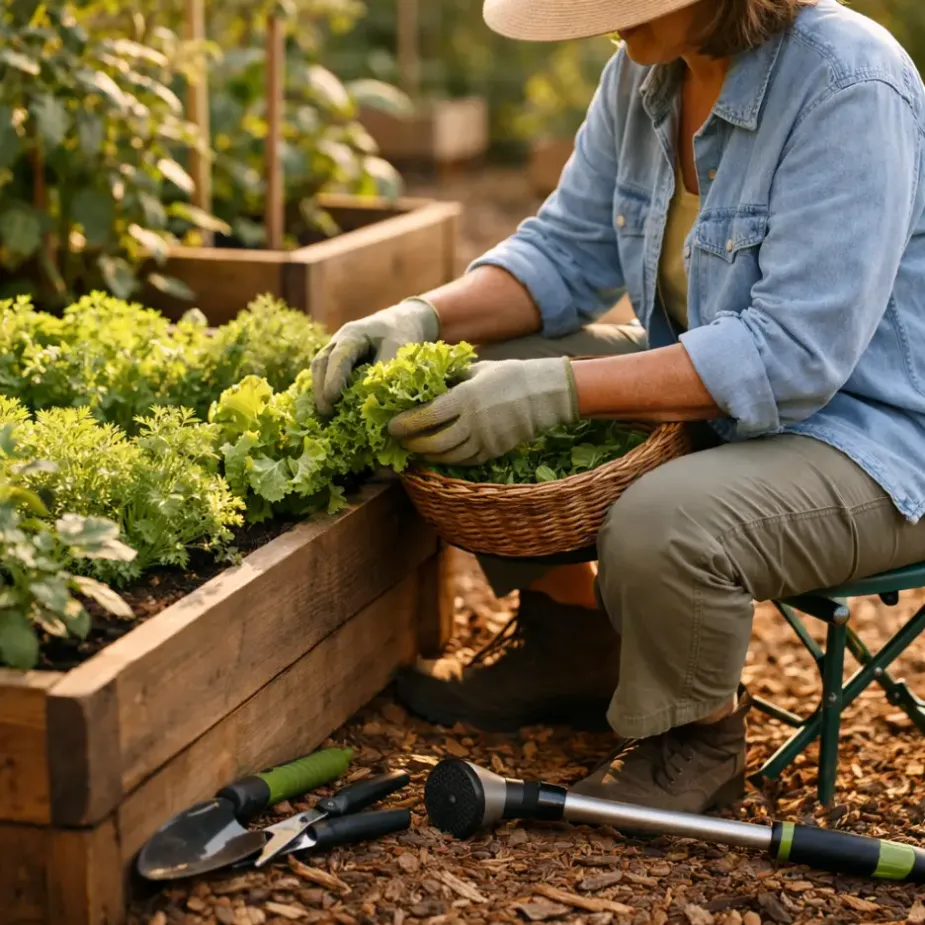
Gentle Gardening: How I Keep Growing with Achy Knees and a Complaining Back
I used to think "real" gardening meant kneeling for hours, hauling heavy bags, and powering through no matter how stiff I felt. These days, my knees have opinions and my lower back has a full-time complaint department. And honestly? I still garden just as much. I just garden smarter. If your body is changing, if your energy dips by mid-afternoon, if you love your garden but dread how you will feel afterward, you are not doing anything wrong. You just need a different rhythm. Let Go of the All-or-Nothing Mindset The biggest shift for me was this: a 20-minute garden session counts. Not every day needs to be a "big garden day." In fact, I now plan for short sessions on purpose.15-20 minutes: weeding one bed 20 minutes: deadheading and quick watering check 30 minutes: harvesting and tidying pathsThree short sessions in a week often do more than one exhausting marathon that leaves you sore for two days. Build Comfort into the Garden Itself Raised Beds Save More Than Time If your back complains when you bend, raised beds are worth every bit of effort and cost. What has helped me most:Beds 12-18 inches high for easier reaching Paths wide enough for a stool or garden cart Keeping bed width to about 3-4 feet so I can reach the center without stretchingIf you are thinking about setup, this guide on Raised Bed Gardening is a great companion. Add Places to Sit I have a small folding stool that follows me around like a loyal dog. Best purchase I made in years.Use a garden kneeler/bench combo Keep one stool in each main garden zone Sit for sowing, thinning, and harvesting low cropsSit-down gardening is still gardening. Period. Soften the Ground You Walk On Hard, uneven paths make fatigue worse. I noticed this right away.Add wood chips or fine gravel on paths Remove tripping hazards and edging that catches your foot Use stepping stones in muddy spotsSmall path upgrades can make long-term gardening feel safer and less tiring. Use Tools That Work with You For years I used whatever cheap tools were around. My hands and shoulders paid for it. Now I choose tools with comfort first:Long-handled weeders to reduce bending Ergonomic grips for less wrist strain Lightweight hoses or watering wands A wheeled cart instead of carrying loadsIf a tool makes you wince, replace it when you can. You are not being fussy. You are protecting your body so you can keep gardening for years. Pace Your Work Like You Mean It I break tasks into categories: bend-heavy, lift-heavy, and easy-standing jobs. Then I alternate. Example of a kinder flow:10 minutes of weeding (bend-heavy) 10 minutes of pruning or tying plants (standing) 10 minutes of harvesting (mixed) Quick clean-up and doneI also use what I call the "tea timer rule": when the timer goes off, I stand up, stretch, and check in with my back before deciding to continue. Choose High-Reward, Low-Strain Crops Some crops are generous without demanding acrobatics. My personal favorites:Bush beans: productive and easy to pick Lettuce mixes: quick harvests, little fuss Herbs near the door: easy snip-and-go Zinnias: cheerful, resilient, and excellent for cuttingI still grow a few ambitious things, but I balance them with plants that make me feel successful. Watering Without Wearing Yourself Out Dragging a heavy hose across the yard used to finish me off. Now I rely on systems and routines:Soaker hoses or drip lines in main beds Watering wand with shutoff valve for containers Morning checks to avoid emergency evening wateringIf watering feels like a daily battle, this post on How to Water a Vegetable Garden the Right Way is very useful, and the same principles apply beautifully to beds and pots. Recovery Is Part of Gardening I did not use to count recovery as garden work. I do now. After every session:2-3 minutes gentle stretching Water for me, not just the plants A quick note in my journal about what to do nextThat last one helps me start easier tomorrow. No spinning wheels, no standing there wondering where to begin. A Gentle Weekly Plan That Actually Works Here is the rhythm I use in spring and summer:Monday: 20 minutes weeding one bed Wednesday: 20-30 minutes planting or pruning Friday: harvest + deadheading + path tidy Weekend (optional): one bigger project only if my body feels up for itNotice there is built-in grace. Missing one day does not ruin the week. My Quiet Rule for Hard Days Some mornings my back is loud before I even make coffee. On those days, I pick one tiny task:pinch basil tips pull five weeds refill the birdbathThat is enough. Truly. A few summers ago, I sat on my little bench after ten slow minutes of deadheading and watched bees move through the salvia. I had done almost nothing by old standards, but I felt calm and proud and very much alive. That is the kind of gardening I want now. Start where your body is today, not where it was twenty years ago. One raised bed, one stool, one short session at a time is still a beautiful garden life.
- 01 Feb, 2026
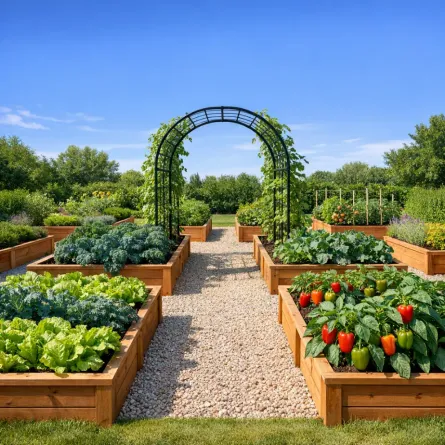
Raised Bed Gardening: Build, Fill, and Grow Your Best Garden Yet
If I could give one piece of advice to a new gardener, it would be this: build a raised bed. Raised beds changed everything for me. They gave me control over my soil, saved my back and knees, and made the whole garden easier to manage without marathon work sessions. Why Raised Beds? Raised beds offer so many advantages over traditional in-ground gardening:Better soil control: You fill them with the perfect growing mix Improved drainage: No more waterlogged roots Less bending and kneeling: Your back will thank you Fewer weeds: Elevated beds are easier to keep weed-free Longer growing season: Soil warms up faster in spring Neat, organized appearance: They make any yard look intentional Accessibility: Can be built at any height for wheelchair or limited-mobility gardeningChoosing the Right Material Wood The most popular choice, and for good reason.Cedar or redwood: Naturally rot-resistant, lasts 10-15 years. My go-to! Douglas fir or pine: More affordable, lasts 5-7 years without treatment Avoid: Treated lumber from before 2004 (may contain arsenic). Modern pressure-treated wood is considered safe, but I stick with untreated for food growingOther MaterialsCorrugated metal: Modern look, lasts decades, heats up quickly in summer Stone or brick: Beautiful and permanent, but expensive and labor-intensive Concrete blocks: Affordable and sturdy, easy to stack Composite lumber: Long-lasting but pricierThe Ideal Dimensions Getting the size right makes all the difference: Width 4 feet maximum. This lets you reach the center from either side without stepping on the soil. If the bed is against a wall or fence, keep it to 2-3 feet wide. Length Whatever works for your space! Common lengths are 4, 6, or 8 feet. Keep in mind that longer beds need extra support to prevent the sides from bowing outward. DepthDepth Best For6 inches Lettuce, herbs, radishes, shallow-rooted crops12 inches Most vegetables, including tomatoes, peppers, and beans18-24 inches Root vegetables like carrots, potatoes, and deep-rooted plants24+ inches Tabletop gardening, wheelchair accessibilityI recommend going with at least 12 inches. It gives you the flexibility to grow almost anything. Building a Simple Raised Bed Here's how I build my favorite 4x8 foot cedar bed: Materials4 cedar boards (2"x12"x8') 4 cedar posts (4"x4"x12") for corners 3-inch exterior wood screws Landscape fabric or cardboard for the bottomStepsCut your boards: Two at 8 feet, two at 4 feet (or have the lumber yard do it) Attach corner posts: Screw posts to the inside corners of the end boards Attach long sides: Screw the 8-foot boards to the corner posts Level the site: Remove grass and level the ground where the bed will sit Place the bed: Set it on the leveled ground and check with a level Line the bottom: Lay cardboard or landscape fabric to suppress weedsThat's it! A basic bed takes about an hour to build. The Perfect Fill: Soil Mix What goes inside your raised bed matters more than the bed itself. Don't just fill it with dirt from your yard! My Favorite Mix50% quality topsoil: The base of your growing medium 30% compost: Nutrient-rich and teeming with beneficial microbes 20% aeration material: Perlite, aged bark, or coarse vermiculiteHow Much Do You Need? For a 4x8 foot bed that's 12 inches deep: You need approximately 32 cubic feet of soil mix. That's about 1 cubic yard. Most garden centers sell soil by the cubic yard, and for multiple beds, bulk delivery is much more economical than bags. Filling TipsFill to the very top, the soil will settle 1-2 inches over the first few weeks Water the soil thoroughly after filling and let it settle before planting Top up with compost each springWhat to Plant in Your Raised Beds Raised beds are perfect for intensive planting. You can space plants closer together than in-ground gardens because the soil is loose and nutrient-rich. Square Foot Gardening One of the best methods for raised beds! Divide your bed into 1-foot squares and plant each square with a different crop:Spacing Crops1 per square foot Tomatoes, peppers, eggplant, broccoli4 per square foot Lettuce, kale, Swiss chard, basil9 per square foot Bush beans, spinach, beets, turnips16 per square foot Radishes, carrots, onions, chivesA Sample 4x8 Bed Plan Here's one of my favorite layouts for a beginner's raised bed:Row 1: Cherry tomato + basil interplanted Row 2: Peppers with parsley on each end Row 3: Lettuce mix with radishes (ready before the lettuce needs space) Row 4: Bush beans Row 5: Zucchini (1 plant, it'll fill the space!) Row 6: Herbs: chives, thyme, and oregano along the edgeMaintaining Your Raised Beds Watering Raised beds dry out faster than in-ground gardens. Plan to water more frequently, especially in summer. A soaker hose or drip irrigation system is a worthwhile investment. This watering guide can help you set a practical routine. Mulching Always mulch your raised beds! A 2-3 inch layer of straw, wood chips, or shredded leaves:Conserves moisture Suppresses weeds Regulates soil temperature Adds organic matter as it breaks downSeasonal CareSpring: Top dress with 1-2 inches of compost, check for wood rot or damage Summer: Keep up with watering and mulching Fall: Clean out spent crops, plant a cover crop or add a thick layer of leaves Winter: Let the bed rest, the soil organisms will keep working beneath the surfaceCommon Mistakes to AvoidMaking beds too wide: You should never have to step on the soil Skimping on soil quality: This is where your money should go Forgetting drainage: Don't place beds on concrete without drainage solutions Overcrowding: Even in rich soil, plants need space for air circulation Neglecting the paths: Mulch or gravel between beds keeps things tidy and mud-freeMy Raised Bed Journey I started with a single 4x8 cedar bed five years ago. That first summer, I grew more tomatoes and lettuce in that small space than I ever managed in my old in-ground rows. Now I have six raised beds, and each one brings me joy. There's something deeply satisfying about those neat wooden frames overflowing with healthy plants. If you're on the fence, start with one simple bed and learn by doing. One bed is plenty to begin, especially if your energy comes in shorter bursts. Related ReadingStarting Your First Vegetable Garden: A Beginner's Complete Guide Mulching for Healthier Garden Beds: A Practical Guide